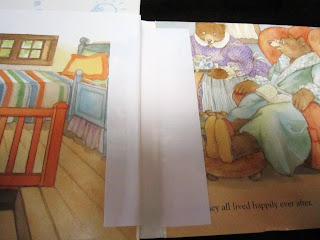
I wrote the words and drew some fairly crude, but colorful, pictures using her colored pencils. I cut out the pictures and used my scanner to place them on the pages and save them as a JPG file. Given my target audience, though, I think it turned out nice. It was a big hit with her!
I have since printed more of these books to give as gifts to her friends. It makes a nice, personalized gift that will be appreciated for years. You can use these steps to make a book for anyone of any age. If you've ever wanted to give a parent or grandparent a personalized photo book, you can use this technique to print your own photos and put them together into a book!
What You'll Need:
- Your book's content in JPG format
- Self-adhesive, glossy photo quality paper such as Invent It! Project Paper or LD Glossy Inkjet Photo Sticker Paper
- Ink-jet printer
- A child's board book that you no longer need (If you don't have one, they can be picked up inexpensively at thrift stores and yard sales)
- Scissors
1. Create your book and save the pages as JPG files. You can do this through a variety of methods:
- Write your words and pictures by hand and scan the pages using a scanner
- Use software such as Powerpoint to create pages with words and your photos by saving the slides in JPG format
- Use software such as Microsoft Paint to create pages with words and pictures
- Use existing digital photos that are already in JPG format, then print any words separately in a word processing program (like Microsoft Word). You can then trim them and attach them separately to your pages.
I'm sure there are other methods that I have missed, but the important thing is to create your content so you can print your pages. Don't worry if the book you create has more pages than your board book. Also, don't forget to create a front and back cover with your book's title and any other information about you and your book!
2. Print your pages using whatever method you normally use to print photos. First, print one test page on regular paper to make sure the dimensions are correct for your board book. Adjust as needed, then reprint on regular paper until it's just right. That way, you won't need to worry about wasting the Invent It Project Paper.
3. Once the dimensions fit your pages, put the Invent It Project Paper in your printer and print out your pages. Let the ink dry completely on your pages before handling them. Trim any excess from your pages (but keep what you trim), peel backing from the Project Paper, and place the adhesive printed page to your board book.
The only tricky parts are making sure each page is centered and making sure there aren't any air bubbles. I like to start in one corner and then gently press it down as I go across.
4. If your board book has too many pages, use your scissors to cut out the extra pages by using your scissors to cut the paper on the inside of the book's spine.
5. Now you can attach your remaining pages to finish your book.
There you have it! You no longer need to pay to have your photo books printed for Grandparent gifts, Christmas, Mother's Day, Father's Day, or birthdays. You can just create and print your own. Plus, gifts are always extra special when you make them yourself.
If you're giving the book as a gift from your child, you can even leave a couple of extra pages in the middle or at the end, then let your child hand write his or her message using markers, and add his or her own drawings!


No comments:
Post a Comment