There's nothing you can't do.

Tuesday, February 28, 2012

How to Throw a Mad Men Party, Part 2 of 4: Dress

Who doesn't love to dress up, right? And the '50's and '60's fashions that we see in the Mad Men episodes are not only still very stylish and elegant, they're widely available as vintage clothing in local thrift and vintage shops, as well as online on sites such as Etsy and eBay.

For over a month, I searched for the perfect dress. I did find some gorgeous ones on Etsy, and some were on year-end clearance and priced to move. Unfortunately, though, vintage sizes run much smaller than modern sizes, so most of the stylish dresses were too small for me.

Every few days, I stopped by our local Goodwill second-hand shop to see if they had any vintage dresses for sale. Lucky for me, my local shop always has a good selection of dresses, and even though none of their actual vintage dresses were my size, I did find a lovely modern dress in a vintage style that reminded me of many worn to the office by Peggy.


I picked it up for $9, and found a pair of plain pumps for another $5. I added in a string of pearls (formerly my grandmother's), gold-tone earrings, and some beige stockings (the less sheer, the better!), and my party dress was complete!

Now, for the hair and make-up. I have really thick, shoulder-length hair, and I toyed with the idea of putting it up, Joan-style. I didn't have any luck, though - my hair was too heavy, and as the hostess trying to get all the food ready before guests arrived, I ran out of time to try any longer. Instead, I pulled the front back, with a bump, and left the very front section loose. I then pulled the loose section to the side and secured it with a bobby pin in order to give me a faux set of Peggy short bangs. I used my curling iron on the bottom sides to give me a little flip.


I didn't do anything too outlandish for makeup - I used liquid eyeliner on the top only, making sure to get the eyeliner as close to my eyelash as possible. I also put mascara only on the top. I used the brightest red lipstick I could find.

Monday, February 27, 2012

How to Throw a Mad Men Party, Part 1 of 4: Invitations

This past weekend, we had a few friends over for a Mad Men-themed party. I just can't begin to say how much fun it was! One of my friends is a Tupperware representative, and she recently asked if I wanted to have a Tupperware party. I thought about it, and I didn't just want to have a Tupperware party, I wanted to have a Mad Men party, complete with a Tupperware demonstration (and a Jello salad mold!). It's no coincidence that Season 5 will debut exactly a month from last night, either! I can't think of a better way to get excited about the new season.

I've been planning this party for a couple of months, so I'll break it into four parts: Invitations, Dress, Menu, and Decorations / Soundtrack.

The invitations were a cinch, thanks to Evite.com. They offer three Man Men themes from which to choose: Don Draper, Joan Holloway, and the entire cast. If none of those pre-made options suit your tastes, you can choose an "Upload Your Photo" design and use a Mad Men image that you prefer. This is what I chose, using the Film Strip design.

Evite makes it simple to send your invitation - simply complete your template with your party details, including location, date, and time, enter the email addresses of anyone you want to invite, and an email will go to them from evite on your behalf. The recipients can then RSVP and/or comment on the invitation, and you, as the host, will be notified with each person's RSVP.

In the hosts' message area of the invitation, I included this text:
All you foxes and cats get ready to put on your Betty Draper or Roger Sterling best and party Mad Men style. 

Dust off your bullet bras and skinny ties and join us for an evening of retro fun. Come and enjoy classic cocktails, hors d'oeuvres, jello salad, and even an old-fashioned Tupperware demonstration! 
Obviously, you can include a message that is specific to your particular party. Just have fun with it and your guests will be sure to be there!

Wednesday, February 22, 2012

How to Turn a Skirt Into a Tissue Holder for your Car

One of my pet peeves is the fact that my car doesn't have a good place to store a box of tissues. Most of the time, I leave the box in the floor, on the passenger side, where it slides back and forth while we zig zag through our curvy, rural roads.


Of course, the box is usually out of my reach every time one of us needs a tissue, so I went in search of a solution that would work for us. 

A little searching, and I found this. I have been in a sewing mood lately (as you can see in my last two posts), so before I bought one, I thought I'd try to make something similar myself.

My fabric scrap bag contains quite a few odds and ends. I'd even forgotten that I used to wear miniskirts, much less kept one, but I found this in my fabric scraps.

I thought it wouldn't be too hard to turn into a tissue box holder for our car. It even has a zipper in the back, which should make changing the boxes easier.

What You'll Need:
-Miniskirt with zipper in the back (this one was a size 7, for what it's worth)
-Webbing or heavy ribbon
-(Optional) Sew-on snap or velcro
-Tissue box


First, I sized it up by slipping the tissue box through the bottom, then doing a box fold along both sides, leaving a slit for the tissues at the top.


I pinned the four edges where the fabric is folded, then removed the tissue box.


I did four simple straight stitches (I used my sewing machine, but you could easily do it by hand) where I'd pinned.


Next, I put the tissue box back into the skirt and turned it upside down.


I folded the skirt down similar to how I'd wrap a gift in paper, then pinned along the center to hold it. I again removed the tissue box (this time from the top, by unzipping the zipper and slipping it out), then sewed a straight stitch where I'd pinned.

I placed the tissue box back into the skirt, and decided where to place the ribbon. I wanted the skirt's zipper to be on the bottom (out of sight), so I tucked the edges of the ribbon into the two folds on the top.


I removed the tissue box one more time, sewed the ribbon into place, then took it out to the car to see how it looks.


There you have it! Now I'll always be able to grab a tissue when it's needed, and the zipper makes changing boxes a cinch. I placed mine over my gear shift, but if you wanted to place it over your headrest, you could cut the ribbon in half and use either a snap or velcro to easily remove it.

Tuesday, February 21, 2012

Scent-sational Teacher's Appreciation Gifts!

Last year was my daughter's first year of preschool, and I had no idea there was such a thing as "Teacher Appreciation Week" (and Day!) until after it was all said and done. So, last year, I hastily picked up a potted plant at our local home improvement super store, added a quick "Thanks for making me grow!" tag, and gave it to her teacher for Easter.

This year, on the other hand, I'm ahead of the game. Teacher Appreciation Day isn't until May 8, 2012, but I finished our gifts today! Altogether, my preschooler has 5 teachers for Art, Assistants, and everything else. I think I may do something extra for her main teacher, but until then, I at least have these lavender sachets ready.


It was really very simple - all I did was use some fabric remnants to make a few little pouches by cutting them into rectangles, folding them in half, and sewing along two edges (with right sides together, leaving one edge open). I filled the open edge with dried lavender buds (but you could use potpourri if you don't have lavender), then closed the open edge with a top stitch.


Then, I tied them together with a bow, and added a card that says, "Thank you for being a SCENT-sational teacher!" I let my daughter sign her name on the backs of the cards, and they're all set!


Sure, it's not completely original (there are lots of other posts like this on the Internet), but I'm really proud of the fact that I finished something early! I'm (unfortunately) known for my procrastination, and I admit that I feel like I work better under pressure (I like to think of it as forced efficiency). But this time, I'm ahead of the game. Yay!

It feels great to get this off my to-do list!

Monday, February 20, 2012

A Pretty Trash Bag for our Car

I drive an old car (1996, to be exact), but it's reliable and I hope it lasts at least a few more years. I try to keep it clean, but that has been quite a challenge with the little one in the back seat. I've been searching for a way to keep the trash out of the floorboard and came across this cute solution. I have a huge bag of fabric remnants, so I used them to make similar solution for our car.


The only differences for my bag were that I used a large sew-on snap, rather than velcro, and I also added a vinyl flower embellishment that is attached with a similar sew-on snap (I glued one piece to the back of the flower). That way, I can remove the flower when I wash the bag.


I love it! How nice it'll be not to have to worry about picking up trash out of the floor every time we get home.

Tuesday, February 14, 2012

Valentine's Day Dinner

Heart-shaped pizza - it doesn't get any easier than this. Happy Valentine's Day!

Monday, February 13, 2012

Valentine's Day Cake Pops

Valentines Day Cake Pops

Earlier today, these cake pops popped into my head and it took my sugar-deprived body a couple of hours to shake it. I made them two years ago, when I was going through my cake pop phase. I usually go with the standard Bakerella recipe - combine a baked cake with frosting, mix it all together, then shape, chill, and dip (or in the case of these... cover in marshmallow fondant).

To make the heart-shaped pop, I used a heart-shaped cookie cutter and filled it with the cake/icing mixture, added a stick and chilled it in the freezer. Then I covered it with fondant, and used tinted fondant and a smaller heart-shaped cookie cutter for the smaller heart decoration.

I've noticed that you can buy cake pop baking pans now, and it kind of makes me sad. I applaud the inventor's moxie for identifying the market and getting out the product, but it's just baking regular cake on a stick, right? Regular cake on a stick will never, ever be as moist and delicious as the original cake/icing combination.

How to Make Cupcake Paper Carnations

I'm always looking for easy crafts for my 4-year-old, and she had a great time making these pretty carnations for Valentine's Day. They're really easy for little hands to make, as long as an adult helps with the steps that require a sharp knife.


What You'll Need:
-Cupcake cups / muffin pan liners of various colors
-Green chenille stems (pipe cleaners)
-Sharp pointed knife

Start by creating groups of 2 - 3 cupcake cups, and use your sharp pointed knife to cut two holes in the bottom, spaced about 1/2" apart. 


Start by making a hook out of one of your pipe cleaners. From the top, push the long end of the hook through one hole, then push the short end through the other hole, ensuring that both ends go through all cupcake cups.


Gently tug the pipe cleaner down until the top of the hook is up against the cupcake cup.


While holding both ends of the pipe cleaner up against the bottom of the cup, use your other hand to squeeze the cup from the bottom up, slightly twisting as you go.

Add another cupcake cup group from the bottom up, by inserting the long end of the hook into one hole and then moving it up, until you can then feed the small end of the hook into the other hole. Gently push the new layer up against the first layer.


Again, hold the pipe cleaner under the cups and use the other hand to squeeze the papers together, gently twisting as you go.

Continue adding more layers until you have the fullness you desire.


When you're done, twist the small end of the pipe cleaner around the large end. If desired, you can fold the long pipe cleaner in half and twist it around itself to make it strong enough to hold the flower. You can also wait until you have an entire bouquet and twist them all together. 


 This was such a fun craft for my little girl. I cut the holes for her and she enjoyed doing everything else herself! 

Friday, February 10, 2012

Make a Heart-Shaped Wreath for Valentine's Day

It's that time of year again, when everywhere you look you see red hearts. Love is in the air, and if you're feeling festive and want to decorate, try this easy DIY wreath from upcycled materials.


What You'll Need:
-Wire Clothes Hanger (2 will be needed for a large wreath)
-Pool Noodle
-Duct Tape
-Scissors
-Needle nose pliers
-Fabric (I used a red sweater that had a fringe trim)
-Ribbon and any other decorations of your choosing
-Small plastic bead necklace
-Needle and thread (or glue)


First, cut your pool noodle into 2 pieces of the same length. If you don't want a large wreath, you don't have to use the entire noodle, but it's better to start with pieces that are too big and trim them down than to start with pieces that are smaller than you'd liked.

Then, use your needle nose pliers to cut the hooked top off the wire hanger. Straighten out what remains of the wire hanger, and check its length against the pool noodle pieces. The wire should be long enough so that several inches of wire remaining stick out of each side of the noodle pieces.

If one piece of wire is long enough for both pieces of pool noodle, cut it in half; if you need more, prepare a second wire hanger by cutting it and straightening it. Feed each piece of wire into the hollow centers of the two pieces of pool noodle.

Start molding the pool noodles into a heart shape. Bend the wires as you go so that the noodle holds its shape. You'll want to cut notches into the underside of curves so that the noodle bends easily. Cutting the upper edges of the heart at an angle will also help the heart fit together more easily.


Cut the top of the bottom pieces of the noodle at an angle as well, so that they are flush.


Use your needle nose pliers to twist the two pieces of wire together. Once they are twisted, use the pliers to trim away the extra wire.


Now, use pieces of duct tape to ensure that everything stays put. I taped the stress points - where the two pieces joined together at the top and bottom, as well as the curves of the heart.


I then cut the fabric of the sweater to wrap the noodle all the way around, plus a few inches for overlap. I used a needle and thread and a simple tacking stitch to join the fabric edges together and attach the bow and hanger, but you could also use fabric glue or a hot glue gun if you don't want to sew.


That's it! You can always buy a wreath form at a craft supply store, but I had a pool noodle that I really didn't want to throw into a landfill. By turning it into a wreath, I'll be able to enjoy it for years to come!

Tuesday, January 24, 2012

Make Your Own Laundry Detergent

If you're looking for easy ways to save money on household items, one easy way you can do so is to make your own laundry detergent. I started making my own a little over 2 years ago because the commercial detergents' scents were too strong for me, and the "Free" products were expensive. This recipe works well in our front-loading machine. It cleans well (I do still use Oxyclean spray to pre-treat heavy stains, but everything else comes right out), has a very light scent, and is easy to make. Plus, I love the fact that as long as I'm well-stocked on the ingredients, I never run out - I just make more when I need it!

What You'll Need:
-2 cups Arm & Hammer Super Washing Soda (in the laundry aisle, but regular baking soda works if you can't find it)
-2 cups Borax
-1 bar Ivory soap
-Air-tight storage container


First, grate the bar of soap.


Then, add the Washing Soda and Borax. Mix it all together.


Transfer the mixture to air-tight storage, and that's it! I use 4 Tbsp. of this powder in our small front-loader. If you have a larger machine, you may want to try a little more.

Friday, January 20, 2012

How to Make Your Own Photo Mat

Do you ever find a great frame and it's close, but not quite the dimensions you need for your photos and prints? A pre-made photo mat would take care of the uneven edges for you, but even the cheap mats can get pricey. Making your own with traditional materials can get tricky if you don't measure and cut just right. Instead, you can make a quick and easy custom photo mat that will look great and be ready in minutes, with no special tools or equipment.

What You'l Need:
-Frame
-Picture(s)
-Ribbon
-Scotch Tape
-Scissors

First, start with your pictures and frame. This frame and mat looked good, but the pictures were slightly smaller than the pre-cut openings.


 I happened to have some narrow blue velvet ribbon that would not only even out the photo edges, but give the frame a nice little splash of color.

I cut four pieces of ribbon for each opening and taped them in place. The lengths don't have to be exact, as long as the exposed edges look uniform.


There you have it! It looks much better, and only took a few minutes. 


This also works if you don't have any mat at all - I used a wider ribbon for a situation like this:


Using your own ribbon allows you to be more creative, too. You can layer them for added color and texture, or use ribbon with printed designs to match your decor. The possibilities are endless!

Tuesday, January 17, 2012

Does your nose run when you run?

If you're a runner, you're probably familiar with the term, "snot rocket." There are a few good reasons why we get runny noses when we run - most races and training schedules occur in the mornings, when the weather is cooler, and cooler temperatures make runny noses. Most runners try to inhale through their noses, which means dust and pollution can get filtered out of the air and trapped in nasal passages. Those irritants can also cause noses to run - it's just the nose doing its job to keep that other stuff out of your body.

While I may see the logic in my runny runner's nose, I don't particularly enjoy the idea of blowing my nose out into the air. My southern sensibilities aren't exactly keen on some of the other options, either, like blowing my nose into my sleeve or hand. 

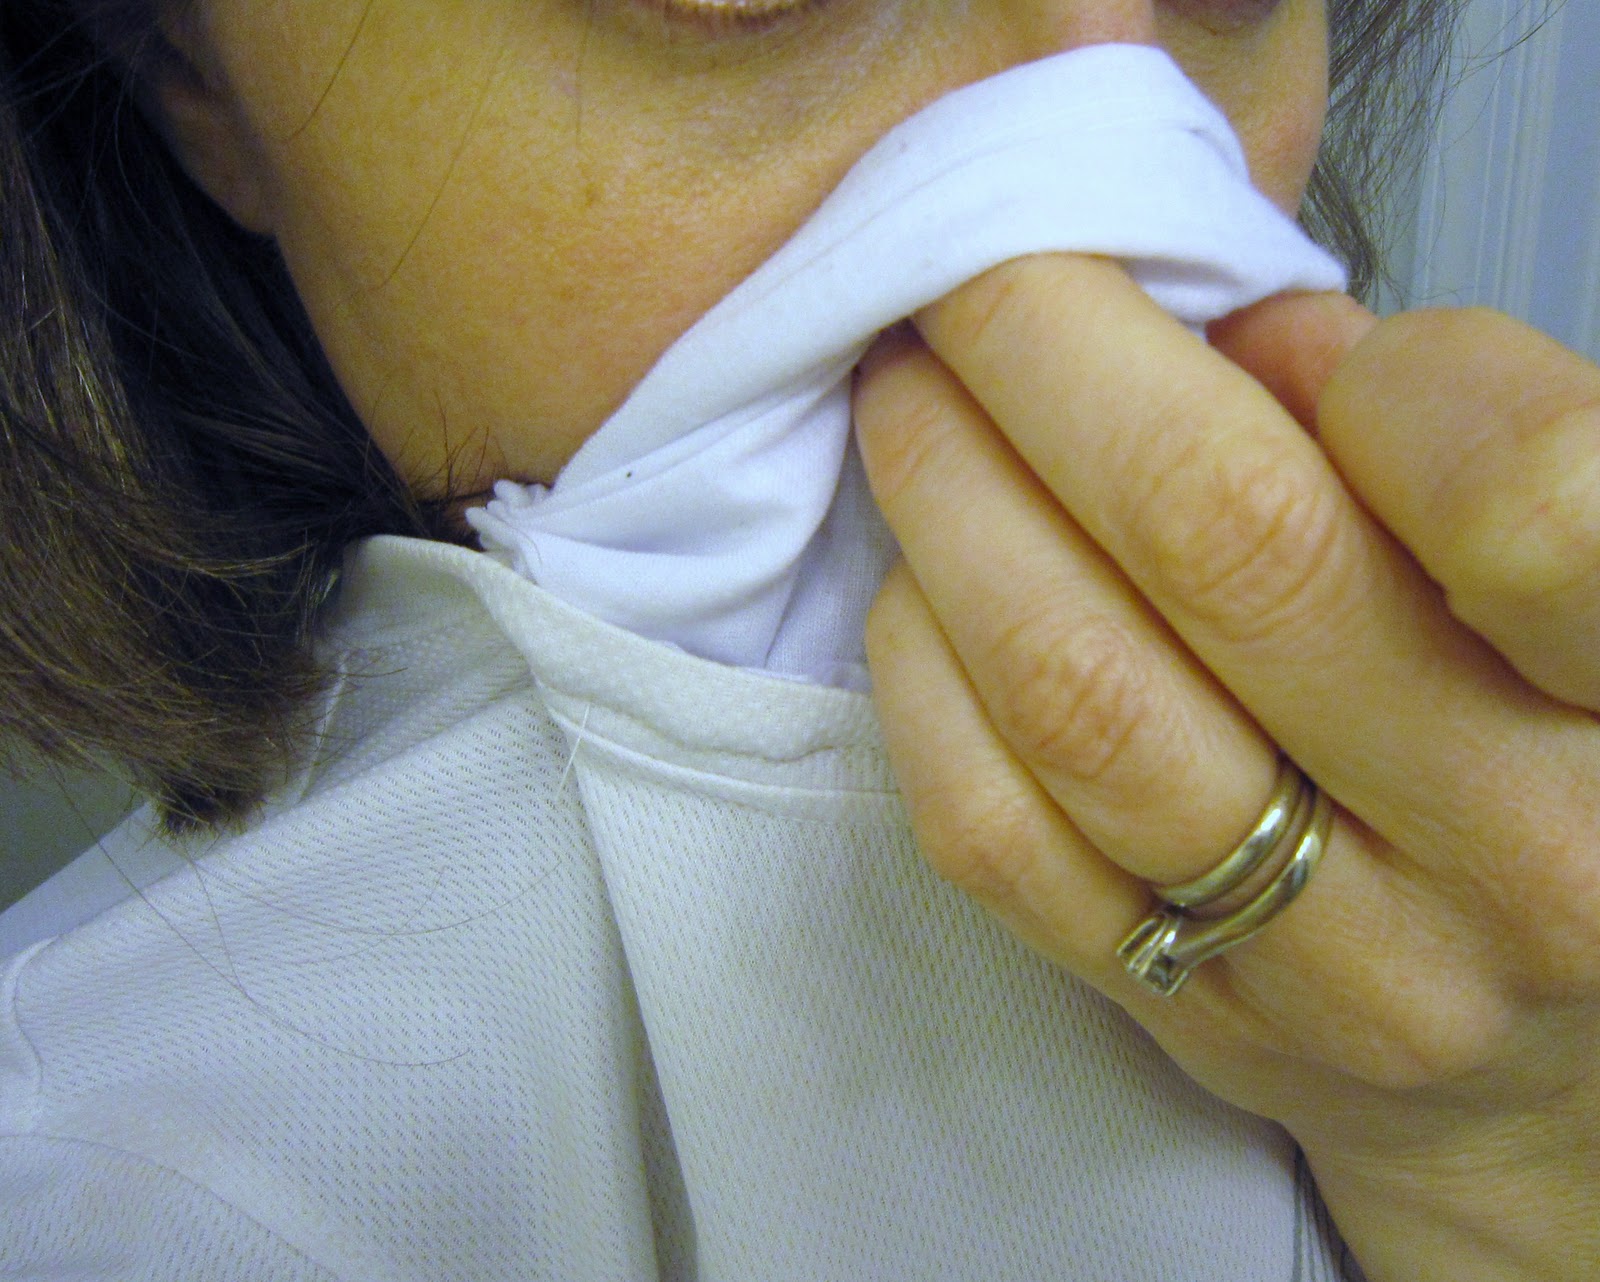
So, I constructed a little hidden pocket in my running shirt. It makes a nice little, "snot pocket" in which to blow my nose while I'm running. It's double-lined, and it folds back up on its own, so that the snot is tucked away inside.

What you'll need:
Running shirt
Handkerchief
Needle and thread (or sewing machine)
Scissors

To start, fold the handkerchief in half, then cut the folded hanky in half. 


I cut mine in half to make it less bulky, but this is a personal preference. If you wanted, you could make it full size, or cut it even smaller if the half-size is still too bulky for your tastes. 

Since I cut the finished edge, I hemmed the cut, unfinished edge of the hanky so it wouldn't ravel. 

I just folded a small piece over, stitched it, folded again, and stitched again. I didn't bother measuring or pinning - it really shouldn't matter for this project.

Next, I folded the hanky like a fan or accordian. I positioned the hanky so that it followed the curve of the shirt's neckline and pinned the edges onto the inside of the shirt. 


I sewed the outside edges to the shirt. I then sewed the inside single fold to the shirt following the neckline. 


This stitch should help it fold back into place after you use it.

Now I can blow my nose into a hanky while I'm running, with just one hand and without slowing my pace, and the hanky will just fold back up into my shirt!