There's nothing you can't do.

Sunday, November 6, 2011

Great Gift Idea: Pillow Personalized by Your Kids

With the Holidays right around the corner, many parents are trying to find fresh ideas to make a custom, personalized gift for friends and relatives. Sure, we have all done our share of crafts with the kids' hand prints and pictures on your home printer. You may have even picked up a recordable greeting card or two to give to your folks. Believe it or not, for only a few dollars each, you can make a keepsake pillow with all three - your child's hand print, a photo chosen by you, and a playable greeting recorded by you.


My daughter and I made these three pillows as Christmas gifts for her father and grandparents. They turned out better than I'd expected, and only took a couple of hours to make (not including the paint drying overnight). My favorite part is the fact that you can press a button in the pillow and hear my daughter tell each recipient, "Merry Christmas" and "I love you." Here is a video of the finished product. Step-by-step instructions can be found after the jump:


What you'll need:


-Fabric pieces large enough for the front and back of the pillow. I used colorful scraps for the front and muslin for the back.
-Fabric paint
-Inkjet Cotton Sheets
-Inkjet printer
-Fiberfill for pillow stuffing (not pictured)
-Voice Recordable Module (10 sec) - Available on Ebay
-Scissors
-Iron
-Paintbrush
-Paper and pen for heart pattern
-You'll also need either a sewing machine or needle and thread

To get started, decide how large you want your heart-shaped pillow to be. Fold a piece of white paper, then draw half of a heart along the fold. Cut your pattern.


Iron your fabric to get all the wrinkles out, then fold it so that you'll be able to use your pattern on it.


Place your pattern with the straight edge along the fold of the fabric, then cut along the curved edges of your pattern.


Next, get out the recordable modules and let your kids record their messages. The good news is that they can keep recording over and over until they get one that all of you like.

A couple of notes about the recordable modules: they're readily available on Ebay and other websites, but they all (unfortunately) appear to ship from overseas*. You'll want to keep this in mind for shipping times and availability - it may take a couple of weeks to receive them. Also, mine didn't come with instructions. To use them,  first remove a clear tab from the circuit board (just pull it straight out). This activates the battery connection. To record, press the button connected to the red wire. The button connected to the yellow wire is to play back. The third small round item is the microphone, and your children will want to put it close to their mouths when they speak. They can say anything you'd like (obviously). My daughter just kept it simple and said, "Merry Christmas, Daddy (Grandma, etc.). I love you."

Once you get the recording you want, clip the red-wired button off to avoid accidentally erasing your message. This will be crucial as you handle the module and put it inside your pillow.


You'll also want to somehow label which module is for which pillow, if you're making more than one at a time.


Next, coat your child's hand with fabric paint and let them put hand prints on the pillows.


At this point, replace the plain white paper in your inkjet printer with as many Inkjet Cotton Sheets as you'll need. Print out your pictures onto the cotton sheets. You may want to do a few test prints onto plain white paper first and check the photo sizes on your hearts, to make sure they're the size you'd like.

I then used fabric paint to paint the words, "Little Hands, Big Heart" on the fronts of the pillows.


Both the printed cotton and the fabric paint will need to completely dry before you proceed. Most manufacturers recommend 24 hours, but you will want to follow the manufacturer's instructions for your specific products.

Once the paint and photo print are completely dry, you're ready to complete the pillow. Place the hearts onto the fabric you chose for the backs of your pillows, and cut around the edges.


Remove the paper backing from your printed cotton photo and trim the excess cotton away from the photo.


Sew the cotton photo onto the back of the pillow.


Place the fabric pieces right sides together.


Sew them together, leaving an opening about 3 - 4 inches along one edge.


Turn the hearts right side out by pulling the fabric through the openings. Be sure to push the fabric all the way out along the seams so that the heart shape shows well. Get out your fiberfill.


Stuff your pillows with fiberfill.


I can't stress this enough: If you haven't already done it, double check your module one last time to make sure that it hasn't been accidentally erased, and if it's still intact, snip the red-wired button on your module. If you try to stuff it into the pillow intact, your message will surely be erased.


Place the module into your pillow. You'll want to leave the speaker (largest round part) near the fabric, and you'll want the yellow-wired button to be kept to the side. The rest can be placed into the middle, inside the fiberfill, so it will be cushioned. Once most of it is tucked away, place the yellow-wired button in the lower part of the pillow (the bottom of the V in the heart, if you will).


Close the opening in the seam by using your sewing machine or needle and thread.

I then used a foam sticker and pen to mark the button on our pillows, but you could either skip this step and demonstrate it yourself, or use any other temporary method of showing the recipient where to press the button to hear the greeting.


That's it! Obviously, if you wanted to skip any of these steps and, for example, just do the pillow without the greeting, or leave off the photo on the back, it would still be a cute keepsake that anyone would appreciate.


*Heads up American manufacturers! I would have gladly paid more if any American-made modules had been available.

Wednesday, November 2, 2011

Make a Dog Sweater from an Old Human Sweater


We have a long-haired Chihuahua, and even though he's pretty big as far as Chihuahuas go, he's a little dog and gets cold pretty easily. He has made it clear that the past few mornings have been much too cold for his tastes by shivering for several minutes after he comes back in from outside.

We decided to make him a doggie sweater from an old sweater I'd kept for craft projects. It's mostly cotton and not the most attractive sweater around, so I thought it'd be perfect for our sweet little dog.


For a small dog like ours, one sleeve is all that is needed, so there is plenty left over for a purse, hat, or other project.

To get started, measure your dog's neck size and then measure around the small end of the sleeve (stretched) to ensure it will fit over his or her head. Then, measure from the base of the neck (collar) down the back as far as you want the sweater to go. Cut that length of sleeve.

Cut the sleeve open, leaving approximately 3" at the narrow end intact.


At this point, you'll want to do a test fit to double check the neck size and length down the dog's back.


Now, go back to the sweater and remove the rest of the sleeve you've already cut.


This will fill in the chest and upper stomach area of the sweater, so do a rough fit and cut two leg openings in the piece. Try it on your dog to make sure the leg openings are wide enough.


Take both pieces off your dog and sew them together by placing them right sides together, then sew down each side. I used a narrow length, wide zigzag stitch to ensure that the sweater doesn't fray.


Finish off all the edges, including the leg holes, with a narrow length, wide zigzag stitch. You could also hem the edges for a more finished look, or if you're a perfectionist. (I am not, obviously.)


Our dog is a male who squats like a girl when he pees, so I didn't want the sweater to come down very far on his stomach. If you have a girl dog or a boy who pees with his leg up, you could use a wider second piece for more coverage.


It isn't the most attractive doggie sweater I've ever seen, but he definitely likes it. We can just call this his "staying in" sweater, and we'll make him a prettier one for going out on the town.

Tuesday, November 1, 2011

Getting Rid of Halloween Candy (Without Eating it All!)

The official Holiday Eating Season begins each Halloween. Do you find yourself facing pounds and pounds of your kids' candy? If you want to do something with it that won't add pounds and pounds to you and your family, start a new tradition - the Halloween Witch!


I got this idea from a friend, and I was lucky enough that she told me when my daughter was only 1. If she'd been older, she may not have gone for it. This is the third year the Halloween Witch has visited us, and my daughter, at 4 this year, seemed more excited about being visited by the witch than most of the other Halloween activities.

The day after Halloween, my daughter pulls out the candy she really wants to keep. 


The rest goes into a bag and placed out on our front porch for the Halloween Witch.


The Witch visits at Midnight and leaves something nice for my daughter as a sign of her gratitude. My daughter believes that the witch takes her extra candy and shares it with children who may not have been able to get as much candy as she had on Halloween. 


In reality, my husband just takes the extra candy to his dentist, who participates in the Halloween Candy Buy Back, to send the candy to our troops overseas. 

I seem to be the only one in our house with a relentless sweet-tooth, so not having the candy here to tempt me is worth a little bribery!

Words, Please!

Dear Internet,

I just want to read. I don't want to open a web page and watch a video, listen to a podcast, or navigate an infographic. It's okay if these are offered as secondary options, but not the only content available. I realize that this request is considered somewhat "old-fashioned", but I really just want to read words on a screen.

Thanks, and have a nice day!

Love,
Me

Sunday, October 30, 2011

How to Freeze Fresh Apples

Apple season is coming to an end, and if you have a giant heap of apples that are starting to go bad, you don't have to work yourself to death cooking applesauce and canning apple butter. With just a little bit of preparation, you can freeze them for later use - in cooking or (my favorite) cut into small pieces in my microwaved oatmeal each morning!

All you really need are apples, a knife, 1/4 c. lemon juice in 3 c. water, a couple of bowls, a flat pan or cookie sheet, and freezer bags. I used an apple corer/slicer to make the job easier, but if you don't have one, you can just slice and core the apples with a regular knife. The lemon juice is the trick to keeping your apples from turning brown, so don't slice and freeze without it!

Get everything ready by mixing the lemon juice and water and thoroughly washing all your apples.


Core and slice your apples, removing any bad spots as you go. If you prefer, peel your apples prior to slicing. I like to leave my peels on, but that's just a personal preference.

Dunk each slice into the lemon juice mixture, then place it onto a flat baking sheet. Once you have the sheet filled in a single layer, place it into your freezer. Leave it there overnight to ensure everything is frozen.


The following day, place all the frozen pieces into a freezer bag, label the bag with the date and contents, and place back into your freezer. Whenever you need some apples, you'll be able to just take out and use the amount you need and leave the rest in the freezer.


Now, you can enjoy your fresh, local apples any time of the year!

Saturday, October 29, 2011

Crock Pot Pumpkin Oatmeal

If you're still looking for new recipes for your freshly cooked pumpkin, you might want to try out this yummy pumpkin oatmeal. It's creamy and savory, and an easy dish to make in your crock pot. It's high in fiber and very filling, so I even like to eat it as an afternoon snack to keep me from getting too hungry before dinner. I also like to add sprinkle a little extra cinnamon on top, and add 1 tsp. crunchy Almond Butter to give it a little more protein. This has become one of my favorite Autumn dishes!


Ingredients


    2 cups Old-fashioned Oats 
    1 teaspoon pumpkin pie spice 
    1/2 teaspoon cinnamon 
    1 teaspoon baking powder 
    1/2 cup Greek yogurt, plain, fat free 
    1/2 cup Egg Beaters or Just Whites 
    1 cup pumpkin puree 
    2/3 cup Ideal brand sweetener (I prefer the brown sugar variety in this recipe) 
    1 1/2 cups nonfat milk


Directions

Add the first 4 ingredients to the crock pot and stir to combine.
In a medium bowl combine the remaining ingredients, pour over oat mixture and stir just until everything is moist.
Cover and cook on low 1 1/2 to 2 hours or until desired consistency.

Serving Size: Makes 8 1/2 cup servings


Nutritional Info
  • Servings Per Recipe: 8
  • Amount Per Serving
  • Calories: 129.6
  • Total Fat: 1.4 g
  • Cholesterol: 0.9 mg
  • Sodium: 118.7 mg
  • Total Carbs: 35.1 g
  • Dietary Fiber: 4.6 g
  • Protein: 7.2 g

Friday, October 28, 2011

Cakester Spiders


Are you looking for an easy Halloween treat? These cute spiders are a tasty and so easy to make, even the youngest trick-or-treaters will be able to lend a hand. Better yet, if you're having a Halloween party, just put everything out and let the kids make them!

What you'll need:


Oreo Cakesters
Pretzel Sticks
M&Ms (Any round variety - I used the White Chocolate Candy Corn flavored ones...So yummy!)
Black Cake Icing

Unwrap the Cakesters, then break 4 pretzel sticks in half. Stick the pretzel sticks into the cakesters, 4 on each side, so that they resemble spider legs.


Then, just add small dots of icing where you'd like to place your eyes, and stick the M&Ms onto the dots. Add a bit more icing on the top of each M&M to finish the eyes, and there you have it!


I'm making these for my daughter's preschool Halloween party, and she and I made these two for a taste test. They're really delicious!

Pumpkin Chili Recipe

Now that you have cooked your fresh pumpkin, you might be looking for new and creative ways to use it. This pumpkin chili is a delicious way to warm you up on a crisp, Autumn day. It's full of fiber and antioxidants, and the pumpkin gives the dish a little sweetness to balance the spices. This recipe is vegetarian, but you can substitute 1 lb. of your favorite ground meat if you prefer.


Ingredients


      1/2 c black beans, dry
      1/2 c white beans, dry
      1/2 c pinto beans, dry
      1/2 medium onion, chopped
      1/2 Green pepper, chopped
      2 tablespoons olive oil
      3 garlic cloves, minced
      2 cups vegetable broth
        1 can red kidney beans, drained

        1/2 c Textured Vegetable Protein (TVP)
        2 c pumpkin (or 1 can)
        1 can (14-1/2 ounces) diced tomatoes, undrained
        2 teaspoons dried parsley flakes
        2 teaspoons chili powder
        1-1/2 teaspoons dried oregano
        1-1/2 teaspoons ground cumin
        1/2 teaspoon salt
        1 teaspoon tumeric


      Directions

      Precook all dry beans until soft. Rinse and drain cooked beans. In a skillet, saute the onion, pepper and garlic in oil until tender. Transfer to a 5-qt. slow cooker; stir in the remaining ingredients. Cover and cook on low for 4-5 hours or until heated through. If you prefer not to use a slow cooker, add all ingredients to a large pot, heat to a low boil while stirring, then reduce heat to Low. Cook on Low for 30 - 40 minutes, stirring every 10 minutes.


      Serving Size: Makes 10 1 Cup servings

      Nutritional Info
      • Servings Per Recipe: 10
      • Amount Per Serving
      • Calories: 197.2
      • Total Fat: 3.4 g
      • Cholesterol: 0.0 mg
      • Sodium: 649.5 mg
      • Total Carbs: 31.4 g
      • Dietary Fiber: 10.1 g
      • Protein: 11.5 g

      Thursday, October 27, 2011

      Roasting Pumpkin Seeds

      In my last post, I mentioned that you might want to roast the pumpkin seeds that you removed prior to cooking your fresh pumpkin. It's easy to do, and fun for kids to help (and eat)!

      First, separate the seeds from the pulp as much as possible. Then, place the seeds in a strainer and rinse them in cold water, removing any remaining pulp as you rinse.


      Next, spray a baking sheet with non-stick spray (or coat with olive oil if you prefer), and spread the seeds in a single layer on the sheet. Add salt and pepper and place into a pre-heated 325 degrees F oven.


      Bake for 25 - 30 minutes, stirring with a spatula every 10 minutes. The pumpkin seeds will be done when they're light brown and crunchy. Store them in an airtight container until they're all gone. Enjoy!

      Wednesday, October 26, 2011

      How to Cook Fresh Pumpkin

      It's Halloween, and pumpkins are everywhere. After Halloween, don't just toss your pumpkin into the compost heap - cook it and use it in recipes for a delicious, healthy and inexpensive treat. Once you taste your recipes with fresh pumpkin, you'll never use canned pumpkin again.

      I like to cook 7 - 8 pumpkins each Fall, and what isn't used immediately gets frozen in plastic freezer bags. I have used it up to a year later without any freezer burn. This cooked pumpkin can be substituted for any recipe that calls for pumpkin - canned pumpkin or pumpkin puree. I have used this to make pumpkin for everything from pumpkin cheesecake, muffins, bread, to soups, and everyone always loves it! If you use this cooked pumpkin for a pie, you'll want to drain the liquid from it prior to using (see note at the bottom of this post).

      Many people also think that you have to use a "pie pumpkin" to cook fresh pumpkin. This isn't true! I always cook our large and small pumpkins this way, and they always turn out great. Don't waste those big pumpkins - cook them!

      First, thoroughly wash the exterior of your pumpkin. Cut it open and remove the seeds and pulp that are inside. If you're interested in roasting the seeds to eat (they're yummy!), separate those from the pulp as much as possible when you're emptying out the pumpkin.


      Once you have cleaned out the pumpkin, cut it into smaller pieces (no larger than 3 - 4") and place them in a single layer in a microwave-safe dish. It's best to put the exterior side up.


      Put 1/2" - 3/4" of water into the dish, and microwave for 10 minutes. Check the pumpkin by poking the flesh with a fork to see if it's soft. Be sure to test pieces in difference sides of the dish to make sure they are all done. If not yet soft, continue to microwave at 3 minute intervals until all pieces are soft. Be sure to add more water if needed - you don't want to let the dish dry out.


      Once the pumpkin pieces are soft, set the dish out and let the pieces cool. You can speed this up by draining out the water, and even placing the dish in the fridge if you want. The pieces don't have to be completely cooled, but you will want them to be cooler for the next step since you'll be handling the pieces.

      When they're cool enough to handle, scoop out the cooked pumpkin flesh with a spoon and discard the rind.


      Place the cooked pumpkin into a pot. If you want, you can continue to cook the pumpkin by adding about 1" of water into the pot and cooking, covered, on medium heat. The pumpkin will continue to get darker and less pulpy as you cook it longer.


      Honestly, though, I normally don't cook it much past this point...I just go to the next step.

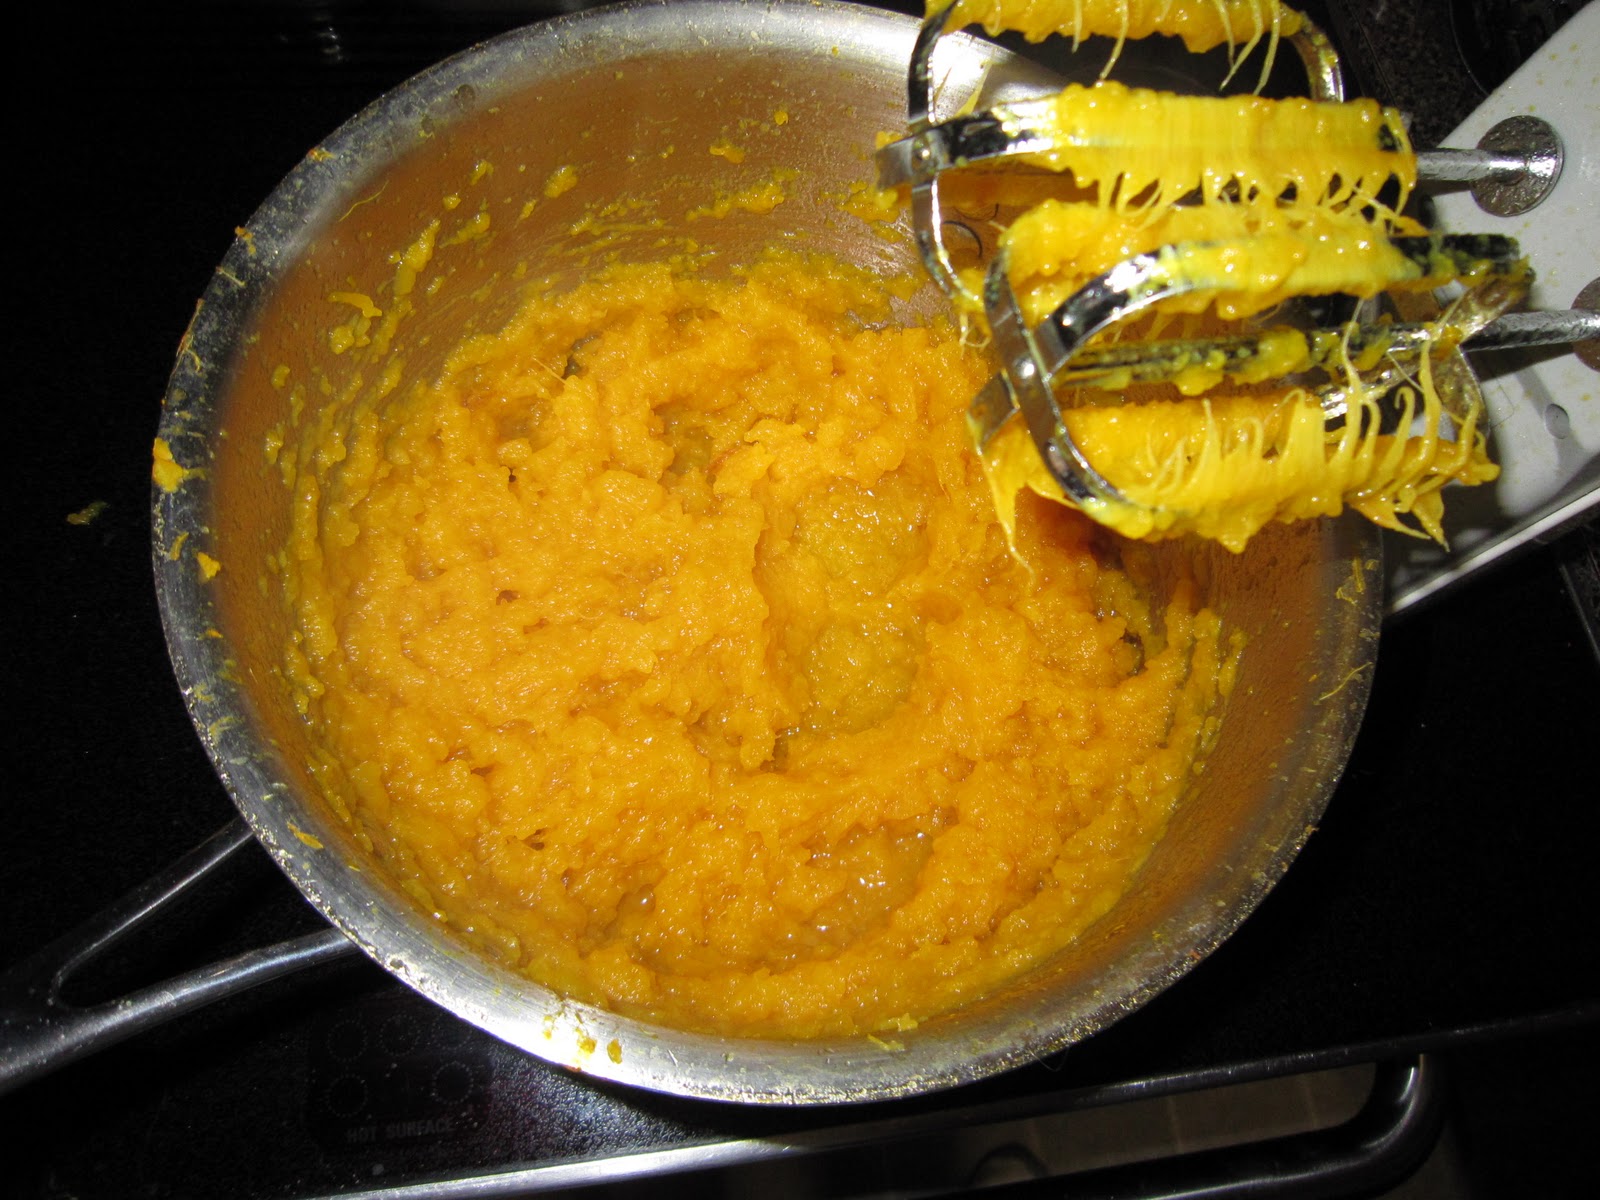
      Drain the excess water and use a potato masher or electric beater to smooth out the cooked pumpkin. You can continue to cook it and beat it to make it smoother, but I normally just beat it once and it works fine for me.


      And there you have it! Go ahead and use for your favorite recipes and freeze what's left. If your recipe calls for 1 can of pumpkin, use 2 cups of this fresh, cooked pumpkin.

      To drain excess liquid from the pumpkin, line a large strainer with cheesecloth (double thickness), coffee filters or a clean dishtowel (that may turn orange). Place the strainer into a bowl, then pour your pumpkin into it. Place it into the refrigerator overnight, and the liquid should drain out into your bowl.

      Tuesday, October 11, 2011

      Make a Neck Warmer for a Little Girl

      Now that the weather is getting chillier, my 4-year-old daughter asked for a tube scarf of her own. I have a pretty decent stash of felted wool sweaters, so I let her pick out the colors she wanted and got to work.

      Here is the finished product, modeled by the cutest cowl scarf-wearing girl this side of the Mississippi:


      To make the felted wool, pick up a pretty 100% wool sweater at a thrift store or yard sale, then wash it, with regular detergent, in your washing machine using hot water. Dry it in the dryer until it's dry. It should shrink considerably, and that shrinkage will felt the wool and give you a nice, tight weave that won't fray. It's important that the sweater is 100% wool, and that it's washed in hot water, not warm. If the sweater isn't 100% wool, you won't get as much shrinkage and it won't felt properly.

      I started with a purple sweater, and since this tube scarf is for a little girl, I simple cut one of the sleeves straight up from the armpit, then made another parallel cut a few inches below that.


      Hang on to the lower sleeve, you'll need it later. At this point, I made my daughter try on the upper sleeve piece, just to make sure it would fit comfortably over her head.

      For the lining, I picked out an old beige long-sleeved t-shirt that once belonged to my husband. The knit was nice and soft. I used the sweater scarf piece to cut a similarly-sized piece from the upper sleeve of the t-shirt.


      Now, place the two pieces right sides together, matching up the seams.


      Sew them together at the top using a mid-length straight stitch. Stretch the fabric as you sew to ensure the scarf will have enough stretch to fit over the wearer's head without breaking the thread.


      Once that stitch is done, flip the scarf so that the wrong sides are together.


      Now stitch together the bottom, using a zigzag stitch along the edge while stretching the fabric to create a lettuce/ruffle edge.


      This is the finished plain tube scarf:


      My daughter wanted something a bit snazzier, though, so we decided to add a ruffle flower to the front.

      Using the lower sleeve, cut three circles - one large, one medium-sized, and one small.


      Using the same stretch/zigzag edge stitch, sew the edge of each circle so that it has a ruffle. Stack the three with the large circle on the bottom and the small on top.


      I then hand-stitched the three onto the front of the scarf, with a small button in the middle and top. 

      And there you have it! It was quick to make and should be snuggly and warm for my daughter this winter!


      If you wanted to make a larger one, you would use the same techniques, just make a larger tube out of the main sweater (and a t-shirt) rather than using the sleeves. 

      The great thing about these tube scarves is that you can pull them up over your face when it's extremely cold, or use them as a large headband/ear cover. They're very versatile, and so easy to make!

      You'll want to hang on to the rest of the sweater, too. It's big enough to make a felted wool purse, a hat, or several other projects that you might see here soon!