I recently came across a fairly plain black messenger-type handbag, and I thought it had promise. I picked it up at a thrift store for $4 and it's in really good condition.
The weave in the front got my attention - I immediately thought it would be fairly easy to dress it up with several different colors of ribbons.
I picked up some pretty ribbon in autumn colors at the local craft store, and pulled out some Quick Grip Glue (this stuff really does work great on everything!).
I decided that I didn't want to weave ribbon into each spot of the purse - I wanted to leave some areas black. For the areas I wanted to fill, I cut the ribbon about an inch longer than I would need on each size (so 2 inches longer total). I then wove the ribbon into the front of the purse, following the pattern that was already there.
I placed a little dab of glue at the outer edges of each piece of ribbon to hold it in place, and that's it!
The best part is that when I get tired of these colors, I can replace the ribbon with new colors.
Obviously, this method won't work for many purses, but hopefully it will inspire you and give you a some new ideas!
There's nothing you can't do.
Showing posts with label autumn. Show all posts
Friday, September 14, 2012
Tuesday, November 1, 2011
Getting Rid of Halloween Candy (Without Eating it All!)
The official Holiday Eating Season begins each Halloween. Do you find yourself facing pounds and pounds of your kids' candy? If you want to do something with it that won't add pounds and pounds to you and your family, start a new tradition - the Halloween Witch!
I got this idea from a friend, and I was lucky enough that she told me when my daughter was only 1. If she'd been older, she may not have gone for it. This is the third year the Halloween Witch has visited us, and my daughter, at 4 this year, seemed more excited about being visited by the witch than most of the other Halloween activities.
The day after Halloween, my daughter pulls out the candy she really wants to keep.
The rest goes into a bag and placed out on our front porch for the Halloween Witch.
The Witch visits at Midnight and leaves something nice for my daughter as a sign of her gratitude. My daughter believes that the witch takes her extra candy and shares it with children who may not have been able to get as much candy as she had on Halloween.
In reality, my husband just takes the extra candy to his dentist, who participates in the Halloween Candy Buy Back, to send the candy to our troops overseas.
I seem to be the only one in our house with a relentless sweet-tooth, so not having the candy here to tempt me is worth a little bribery!
Sunday, October 30, 2011
How to Freeze Fresh Apples
Apple season is coming to an end, and if you have a giant heap of apples that are starting to go bad, you don't have to work yourself to death cooking applesauce and canning apple butter. With just a little bit of preparation, you can freeze them for later use - in cooking or (my favorite) cut into small pieces in my microwaved oatmeal each morning!
All you really need are apples, a knife, 1/4 c. lemon juice in 3 c. water, a couple of bowls, a flat pan or cookie sheet, and freezer bags. I used an apple corer/slicer to make the job easier, but if you don't have one, you can just slice and core the apples with a regular knife. The lemon juice is the trick to keeping your apples from turning brown, so don't slice and freeze without it!
Get everything ready by mixing the lemon juice and water and thoroughly washing all your apples.
Core and slice your apples, removing any bad spots as you go. If you prefer, peel your apples prior to slicing. I like to leave my peels on, but that's just a personal preference.
Dunk each slice into the lemon juice mixture, then place it onto a flat baking sheet. Once you have the sheet filled in a single layer, place it into your freezer. Leave it there overnight to ensure everything is frozen.
The following day, place all the frozen pieces into a freezer bag, label the bag with the date and contents, and place back into your freezer. Whenever you need some apples, you'll be able to just take out and use the amount you need and leave the rest in the freezer.
Now, you can enjoy your fresh, local apples any time of the year!
All you really need are apples, a knife, 1/4 c. lemon juice in 3 c. water, a couple of bowls, a flat pan or cookie sheet, and freezer bags. I used an apple corer/slicer to make the job easier, but if you don't have one, you can just slice and core the apples with a regular knife. The lemon juice is the trick to keeping your apples from turning brown, so don't slice and freeze without it!
Get everything ready by mixing the lemon juice and water and thoroughly washing all your apples.
Core and slice your apples, removing any bad spots as you go. If you prefer, peel your apples prior to slicing. I like to leave my peels on, but that's just a personal preference.
Dunk each slice into the lemon juice mixture, then place it onto a flat baking sheet. Once you have the sheet filled in a single layer, place it into your freezer. Leave it there overnight to ensure everything is frozen.
The following day, place all the frozen pieces into a freezer bag, label the bag with the date and contents, and place back into your freezer. Whenever you need some apples, you'll be able to just take out and use the amount you need and leave the rest in the freezer.
Now, you can enjoy your fresh, local apples any time of the year!
Saturday, October 29, 2011
Crock Pot Pumpkin Oatmeal
If you're still looking for new recipes for your freshly cooked pumpkin, you might want to try out this yummy pumpkin oatmeal. It's creamy and savory, and an easy dish to make in your crock pot. It's high in fiber and very filling, so I even like to eat it as an afternoon snack to keep me from getting too hungry before dinner. I also like to add sprinkle a little extra cinnamon on top, and add 1 tsp. crunchy Almond Butter to give it a little more protein. This has become one of my favorite Autumn dishes!
Ingredients
- 2 cups Old-fashioned Oats
- 1 teaspoon pumpkin pie spice
- 1/2 teaspoon cinnamon
- 1 teaspoon baking powder
- 1/2 cup Greek yogurt, plain, fat free
- 1/2 cup Egg Beaters or Just Whites
- 1 cup pumpkin puree
- 2/3 cup Ideal brand sweetener (I prefer the brown sugar variety in this recipe)
- 1 1/2 cups nonfat milk
Directions
Add the first 4 ingredients to the crock pot and stir to combine.
In a medium bowl combine the remaining ingredients, pour over oat mixture and stir just until everything is moist.
Cover and cook on low 1 1/2 to 2 hours or until desired consistency.
Serving Size: Makes 8 1/2 cup servings
In a medium bowl combine the remaining ingredients, pour over oat mixture and stir just until everything is moist.
Cover and cook on low 1 1/2 to 2 hours or until desired consistency.
Serving Size: Makes 8 1/2 cup servings
Nutritional Info
- Servings Per Recipe: 8
- Amount Per Serving
- Calories: 129.6
- Total Fat: 1.4 g
- Cholesterol: 0.9 mg
- Sodium: 118.7 mg
- Total Carbs: 35.1 g
- Dietary Fiber: 4.6 g
- Protein: 7.2 g
Friday, October 28, 2011
Pumpkin Chili Recipe
Now that you have cooked your fresh pumpkin, you might be looking for new and creative ways to use it. This pumpkin chili is a delicious way to warm you up on a crisp, Autumn day. It's full of fiber and antioxidants, and the pumpkin gives the dish a little sweetness to balance the spices. This recipe is vegetarian, but you can substitute 1 lb. of your favorite ground meat if you prefer.
1 can red kidney beans, drained
Ingredients
- 1/2 c black beans, dry
- 1/2 c white beans, dry
- 1/2 medium onion, chopped
- 1/2 Green pepper, chopped
- 2 tablespoons olive oil
- 3 garlic cloves, minced
- 2 cups vegetable broth
- 1/2 c Textured Vegetable Protein (TVP)
- 2 c pumpkin (or 1 can)
- 1 can (14-1/2 ounces) diced tomatoes, undrained
- 2 teaspoons dried parsley flakes
- 2 teaspoons chili powder
- 1-1/2 teaspoons dried oregano
- 1-1/2 teaspoons ground cumin
- 1/2 teaspoon salt
- 1 teaspoon tumeric
Directions
Precook all dry beans until soft. Rinse and drain cooked beans. In a skillet, saute the onion, pepper and garlic in oil until tender. Transfer to a 5-qt. slow cooker; stir in the remaining ingredients. Cover and cook on low for 4-5 hours or until heated through. If you prefer not to use a slow cooker, add all ingredients to a large pot, heat to a low boil while stirring, then reduce heat to Low. Cook on Low for 30 - 40 minutes, stirring every 10 minutes.
Serving Size: Makes 10 1 Cup servings
Nutritional Info
- Servings Per Recipe: 10
- Amount Per Serving
- Calories: 197.2
- Total Fat: 3.4 g
- Cholesterol: 0.0 mg
- Sodium: 649.5 mg
- Total Carbs: 31.4 g
- Dietary Fiber: 10.1 g
- Protein: 11.5 g
Thursday, October 27, 2011
Roasting Pumpkin Seeds
In my last post, I mentioned that you might want to roast the pumpkin seeds that you removed prior to cooking your fresh pumpkin. It's easy to do, and fun for kids to help (and eat)!
First, separate the seeds from the pulp as much as possible. Then, place the seeds in a strainer and rinse them in cold water, removing any remaining pulp as you rinse.
Next, spray a baking sheet with non-stick spray (or coat with olive oil if you prefer), and spread the seeds in a single layer on the sheet. Add salt and pepper and place into a pre-heated 325 degrees F oven.
Bake for 25 - 30 minutes, stirring with a spatula every 10 minutes. The pumpkin seeds will be done when they're light brown and crunchy. Store them in an airtight container until they're all gone. Enjoy!
First, separate the seeds from the pulp as much as possible. Then, place the seeds in a strainer and rinse them in cold water, removing any remaining pulp as you rinse.
Next, spray a baking sheet with non-stick spray (or coat with olive oil if you prefer), and spread the seeds in a single layer on the sheet. Add salt and pepper and place into a pre-heated 325 degrees F oven.
Bake for 25 - 30 minutes, stirring with a spatula every 10 minutes. The pumpkin seeds will be done when they're light brown and crunchy. Store them in an airtight container until they're all gone. Enjoy!
Wednesday, October 26, 2011
How to Cook Fresh Pumpkin
It's Halloween, and pumpkins are everywhere. After Halloween, don't just toss your pumpkin into the compost heap - cook it and use it in recipes for a delicious, healthy and inexpensive treat. Once you taste your recipes with fresh pumpkin, you'll never use canned pumpkin again.
I like to cook 7 - 8 pumpkins each Fall, and what isn't used immediately gets frozen in plastic freezer bags. I have used it up to a year later without any freezer burn. This cooked pumpkin can be substituted for any recipe that calls for pumpkin - canned pumpkin or pumpkin puree. I have used this to make pumpkin for everything from pumpkin cheesecake, muffins, bread, to soups, and everyone always loves it! If you use this cooked pumpkin for a pie, you'll want to drain the liquid from it prior to using (see note at the bottom of this post).
Many people also think that you have to use a "pie pumpkin" to cook fresh pumpkin. This isn't true! I always cook our large and small pumpkins this way, and they always turn out great. Don't waste those big pumpkins - cook them!
First, thoroughly wash the exterior of your pumpkin. Cut it open and remove the seeds and pulp that are inside. If you're interested in roasting the seeds to eat (they're yummy!), separate those from the pulp as much as possible when you're emptying out the pumpkin.
Once you have cleaned out the pumpkin, cut it into smaller pieces (no larger than 3 - 4") and place them in a single layer in a microwave-safe dish. It's best to put the exterior side up.
Put 1/2" - 3/4" of water into the dish, and microwave for 10 minutes. Check the pumpkin by poking the flesh with a fork to see if it's soft. Be sure to test pieces in difference sides of the dish to make sure they are all done. If not yet soft, continue to microwave at 3 minute intervals until all pieces are soft. Be sure to add more water if needed - you don't want to let the dish dry out.
Once the pumpkin pieces are soft, set the dish out and let the pieces cool. You can speed this up by draining out the water, and even placing the dish in the fridge if you want. The pieces don't have to be completely cooled, but you will want them to be cooler for the next step since you'll be handling the pieces.
When they're cool enough to handle, scoop out the cooked pumpkin flesh with a spoon and discard the rind.
Place the cooked pumpkin into a pot. If you want, you can continue to cook the pumpkin by adding about 1" of water into the pot and cooking, covered, on medium heat. The pumpkin will continue to get darker and less pulpy as you cook it longer.
Honestly, though, I normally don't cook it much past this point...I just go to the next step.
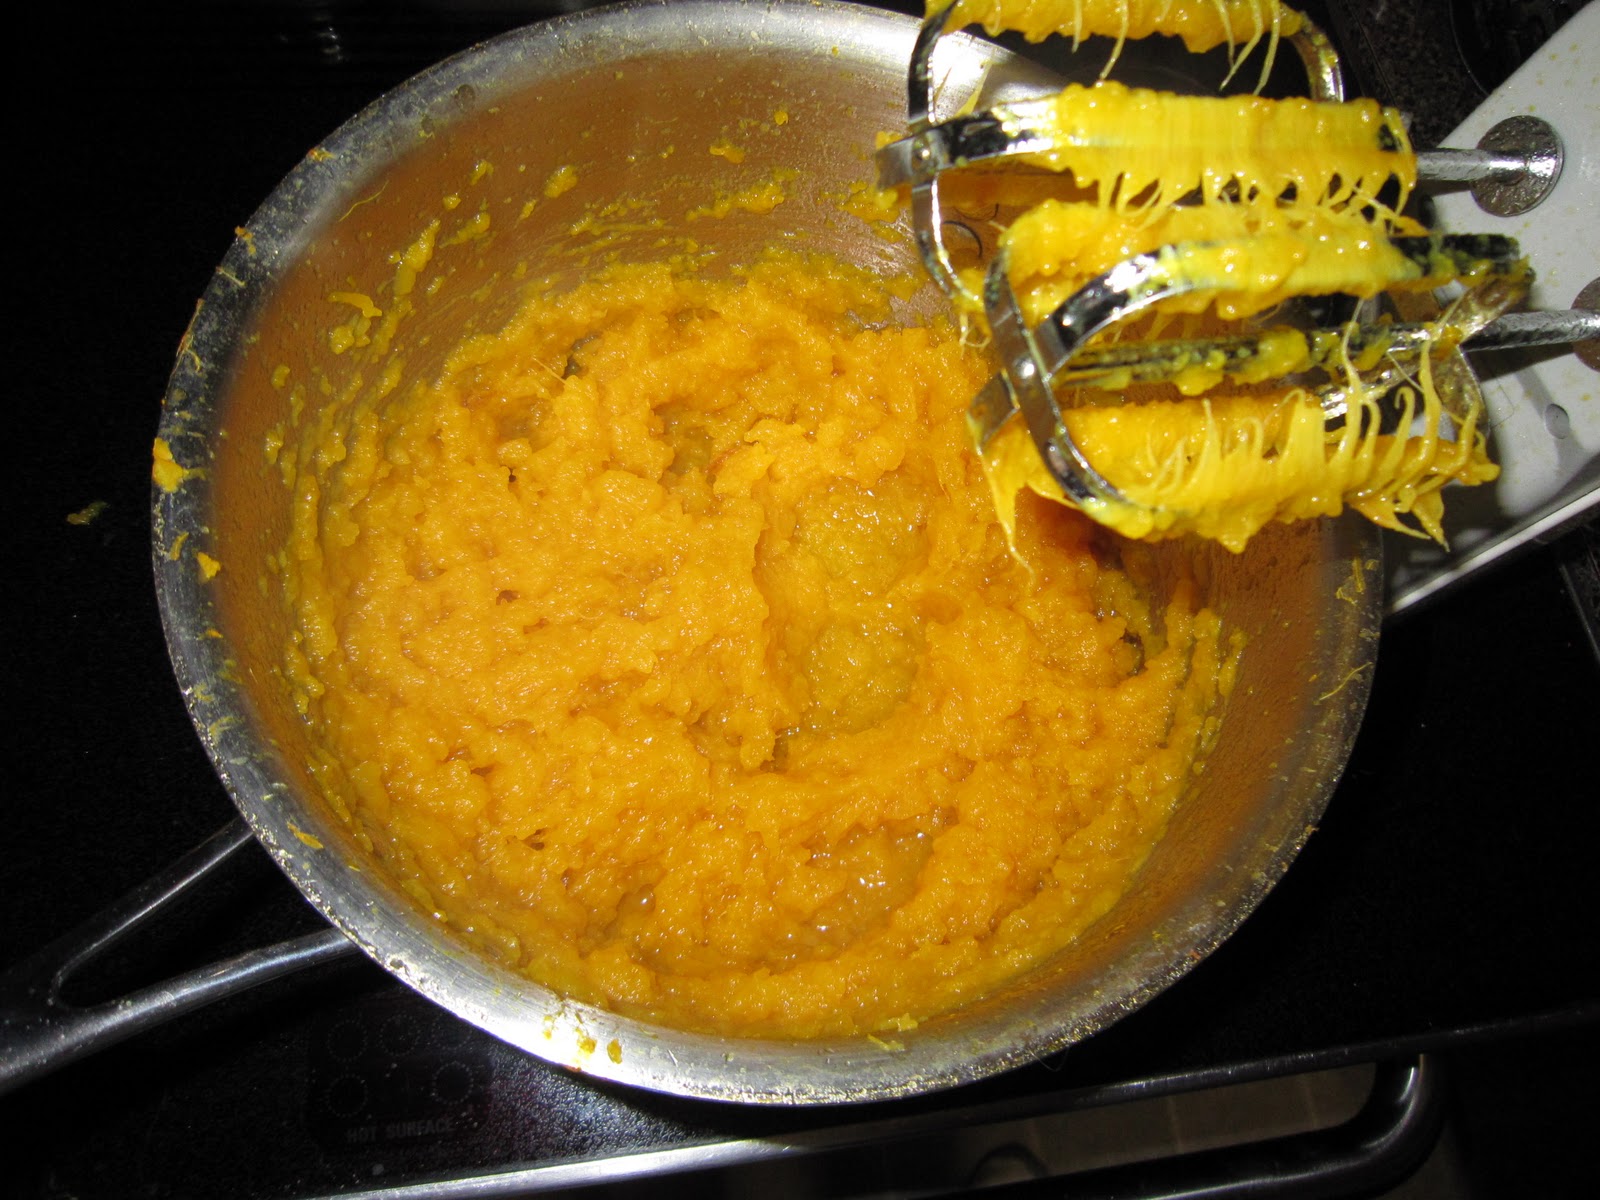
Drain the excess water and use a potato masher or electric beater to smooth out the cooked pumpkin. You can continue to cook it and beat it to make it smoother, but I normally just beat it once and it works fine for me.
And there you have it! Go ahead and use for your favorite recipes and freeze what's left. If your recipe calls for 1 can of pumpkin, use 2 cups of this fresh, cooked pumpkin.
To drain excess liquid from the pumpkin, line a large strainer with cheesecloth (double thickness), coffee filters or a clean dishtowel (that may turn orange). Place the strainer into a bowl, then pour your pumpkin into it. Place it into the refrigerator overnight, and the liquid should drain out into your bowl.
I like to cook 7 - 8 pumpkins each Fall, and what isn't used immediately gets frozen in plastic freezer bags. I have used it up to a year later without any freezer burn. This cooked pumpkin can be substituted for any recipe that calls for pumpkin - canned pumpkin or pumpkin puree. I have used this to make pumpkin for everything from pumpkin cheesecake, muffins, bread, to soups, and everyone always loves it! If you use this cooked pumpkin for a pie, you'll want to drain the liquid from it prior to using (see note at the bottom of this post).
Many people also think that you have to use a "pie pumpkin" to cook fresh pumpkin. This isn't true! I always cook our large and small pumpkins this way, and they always turn out great. Don't waste those big pumpkins - cook them!
First, thoroughly wash the exterior of your pumpkin. Cut it open and remove the seeds and pulp that are inside. If you're interested in roasting the seeds to eat (they're yummy!), separate those from the pulp as much as possible when you're emptying out the pumpkin.
Once you have cleaned out the pumpkin, cut it into smaller pieces (no larger than 3 - 4") and place them in a single layer in a microwave-safe dish. It's best to put the exterior side up.
Put 1/2" - 3/4" of water into the dish, and microwave for 10 minutes. Check the pumpkin by poking the flesh with a fork to see if it's soft. Be sure to test pieces in difference sides of the dish to make sure they are all done. If not yet soft, continue to microwave at 3 minute intervals until all pieces are soft. Be sure to add more water if needed - you don't want to let the dish dry out.
Once the pumpkin pieces are soft, set the dish out and let the pieces cool. You can speed this up by draining out the water, and even placing the dish in the fridge if you want. The pieces don't have to be completely cooled, but you will want them to be cooler for the next step since you'll be handling the pieces.
When they're cool enough to handle, scoop out the cooked pumpkin flesh with a spoon and discard the rind.
Place the cooked pumpkin into a pot. If you want, you can continue to cook the pumpkin by adding about 1" of water into the pot and cooking, covered, on medium heat. The pumpkin will continue to get darker and less pulpy as you cook it longer.
Honestly, though, I normally don't cook it much past this point...I just go to the next step.
Drain the excess water and use a potato masher or electric beater to smooth out the cooked pumpkin. You can continue to cook it and beat it to make it smoother, but I normally just beat it once and it works fine for me.
And there you have it! Go ahead and use for your favorite recipes and freeze what's left. If your recipe calls for 1 can of pumpkin, use 2 cups of this fresh, cooked pumpkin.
To drain excess liquid from the pumpkin, line a large strainer with cheesecloth (double thickness), coffee filters or a clean dishtowel (that may turn orange). Place the strainer into a bowl, then pour your pumpkin into it. Place it into the refrigerator overnight, and the liquid should drain out into your bowl.
Subscribe to:
Posts (Atom)