There's nothing you can't do.
Showing posts with label cook. Show all posts

Thursday, April 12, 2012

Grilled Cheese in the Waffle Iron

Today is National Grilled Cheese Day (who declares these things, really? I'm curious). To celebrate, I made my daughter a grilled cheese in my Winnie the Pooh Waffle Maker. It couldn't have been easier, quicker, or tastier than this!


I love this waffle maker. It was a Christmas gift a few years ago, and I love using it for everything from waffles, to cinnamon rolls, to sandwiches!


Everything comes out with Tigger on one side, and Pooh on the other, so it makes for a fun treat for my daughter.


Prior to putting it in the waffle maker, I did fold two edges of the cheese so that the cheese wouldn't ooze out onto the hot interior surface.


I then buttered the bread and closed the waffle maker. I waited about 60 seconds, and that's it!


She loved it! And it was fun for me, too!

Thursday, April 5, 2012

Make Your Own Peeps (Without All the Bad Stuff!)

Growing up, I always found a few Peeps in my Easter basket on Easter morning. I looked forward to it all year long...that crunchy sugar coating with soft marshmallow inside. Now, we can buy Peeps all year long, as they're usually themed for every holiday and not just Easter. While they're cute (and still just as delicious!), I thought it might be fun to make our own for a change, leaving out the artificial colors, corn syrup, and preservatives.


Peeps are pretty simple: shaped marshmallow covered in colored sugar. So, I started by making my own marshmallows. I'd never made marshmallows before, but I'll try most anything at least once. I found this recipe online and thought it sounded fairly straightforward. I didn't want to use corn syrup, though, so I substituted honey in its place. The only problem with using honey is that the marshmallows were honey-flavored. This is fine if you and your family like the taste of honey, but if you don't, you might want to try this recipe instead. I found it after I'd already made the marshmallows, and I'm definitely planning to use it next time I make something that calls for corn syrup.


Making the marshmallows was a lot of fun, and yes, it was messy, but not as messy as I thought it'd be!

Next, I picked out my cutting shapes and got the colored sugar ready. For the shapes, I just used my Spring cookie cutters, but you could also put the soft marshmallow into a decorator bag and use a piping tip to pipe chick shapes.

To make the naturally colored sugar, I used orange juice for yellow, strawberry preserves for pink, and blueberry juice concentrate for purple.


I simply put some sugar into a plastic bag, then added a bit of each juice until I got the desired color. I did like the results, and the juices gave the peeps a subtle flavor that was an unexpected surprise.


My marshmallows turned out a bit thick, and with my large-sized cutters, they made some huge Peeps!


Once I had the shapes, I just sprinkled them with the colored sugar. I then melted a bit of dark chocolate to add some detail, and used a toothpick to create the eyes and lines.


That's it! I used the extra marshmallow and cut it into smaller pieces, and drizzled the leftover melted chocolate on them. Both the Peeps and the marshmallows here a big hit with the family, and with me!


Wednesday, March 7, 2012

Quinoa and Black Bean Casserole

All this talk of Meatless March has inspired me to try out some new vegetarian dishes. I came across a vegan quinoa and black bean casserole that used non-dairy cheese, and I decided to use a few of my ingredients on hand to come up with a spicy version of my own.


Ingredients


    -1 large Sweet potato, raw and diced 
    -Whole Grain Quinoa, 1 cup dry or 2 cups cooked 
    -2 cups cooked black beans 
    -Ground tumeric, 2 tbsp  
    -2 cans Cut Diced Tomatoes with green chiles 
    -1/2 tbsp ground Oregano 
    -6 oz. shredded Cheddar Cheese 
    -1 tbsp Basil 2 oz shredded Mozzarella Cheese, part skim milk


Directions

Cook Quinoa and Black beans according to directions on label.

Spray a 9" x 12" casserole dish with non-stick spray and spread Quinoa into the pan.

Combine everything else, except the Mozarella, into a mixing bowl and stir to mix. Spread the mixture onto the Quinoa, then top with the Mozzarella.

Bake at 375 degrees for 40 minutes.

Serving Size: Makes 6-1 cup servings


Nutritional Info
  • Servings Per Recipe: 6
  • Amount Per Serving
  • Calories: 380.1
  • Total Fat: 13.3 g
  • Cholesterol: 35.1 mg
  • Sodium: 398.4 mg
  • Total Carbs: 46.6 g
  • Dietary Fiber: 9.9 g
  • Protein: 19.7 g

It was so yummy! I think it would be great on a bed of fresh greens. I'll have to try that with all the leftovers!

Wednesday, December 28, 2011

New World Pumpkin Soup

This is my favorite pumpkin soup! I came across this recipe a couple of years ago, and it's best with freshly cooked pumpkin.

This is the original recipe. I modified it to accommodate the ingredients I had on-hand:

    -Pumpkin, cooked, 4 cups, mashed 
    -Chorizo sausage, 12 oz 
    -Garlic, 3 cloves 
    -Milk, canned, evaporated, 1 can (13 oz) 
    -Chicken Broth, 2 cup (8 fl oz) 
    -Oregano, ground, 1 tsp

1. If using fresh chorizo, take it out of the skin and break it up into the pan. Cook until sausage is brown. 2. Add garlic and stir until fragrant, 30-60 seconds. 
3. Add the rest of the ingredients, ending with the chicken broth. Add as much broth as you need to make it the thickness you want. Salt to taste.

Serving Size: Makes 7-1 cup servings

Nutritional Info
  • Servings Per Recipe: 7
  • Amount Per Serving
  • Calories: 305.0
  • Total Fat: 22.3 g
  • Cholesterol: 58.3 mg
  • Sodium: 1,074.6 mg
  • Total Carbs: 10.3 g
  • Dietary Fiber: 0.9 g
  • Protein: 15.9 g

Wednesday, October 26, 2011

How to Cook Fresh Pumpkin

It's Halloween, and pumpkins are everywhere. After Halloween, don't just toss your pumpkin into the compost heap - cook it and use it in recipes for a delicious, healthy and inexpensive treat. Once you taste your recipes with fresh pumpkin, you'll never use canned pumpkin again.

I like to cook 7 - 8 pumpkins each Fall, and what isn't used immediately gets frozen in plastic freezer bags. I have used it up to a year later without any freezer burn. This cooked pumpkin can be substituted for any recipe that calls for pumpkin - canned pumpkin or pumpkin puree. I have used this to make pumpkin for everything from pumpkin cheesecake, muffins, bread, to soups, and everyone always loves it! If you use this cooked pumpkin for a pie, you'll want to drain the liquid from it prior to using (see note at the bottom of this post).

Many people also think that you have to use a "pie pumpkin" to cook fresh pumpkin. This isn't true! I always cook our large and small pumpkins this way, and they always turn out great. Don't waste those big pumpkins - cook them!

First, thoroughly wash the exterior of your pumpkin. Cut it open and remove the seeds and pulp that are inside. If you're interested in roasting the seeds to eat (they're yummy!), separate those from the pulp as much as possible when you're emptying out the pumpkin.


Once you have cleaned out the pumpkin, cut it into smaller pieces (no larger than 3 - 4") and place them in a single layer in a microwave-safe dish. It's best to put the exterior side up.


Put 1/2" - 3/4" of water into the dish, and microwave for 10 minutes. Check the pumpkin by poking the flesh with a fork to see if it's soft. Be sure to test pieces in difference sides of the dish to make sure they are all done. If not yet soft, continue to microwave at 3 minute intervals until all pieces are soft. Be sure to add more water if needed - you don't want to let the dish dry out.


Once the pumpkin pieces are soft, set the dish out and let the pieces cool. You can speed this up by draining out the water, and even placing the dish in the fridge if you want. The pieces don't have to be completely cooled, but you will want them to be cooler for the next step since you'll be handling the pieces.

When they're cool enough to handle, scoop out the cooked pumpkin flesh with a spoon and discard the rind.


Place the cooked pumpkin into a pot. If you want, you can continue to cook the pumpkin by adding about 1" of water into the pot and cooking, covered, on medium heat. The pumpkin will continue to get darker and less pulpy as you cook it longer.


Honestly, though, I normally don't cook it much past this point...I just go to the next step.

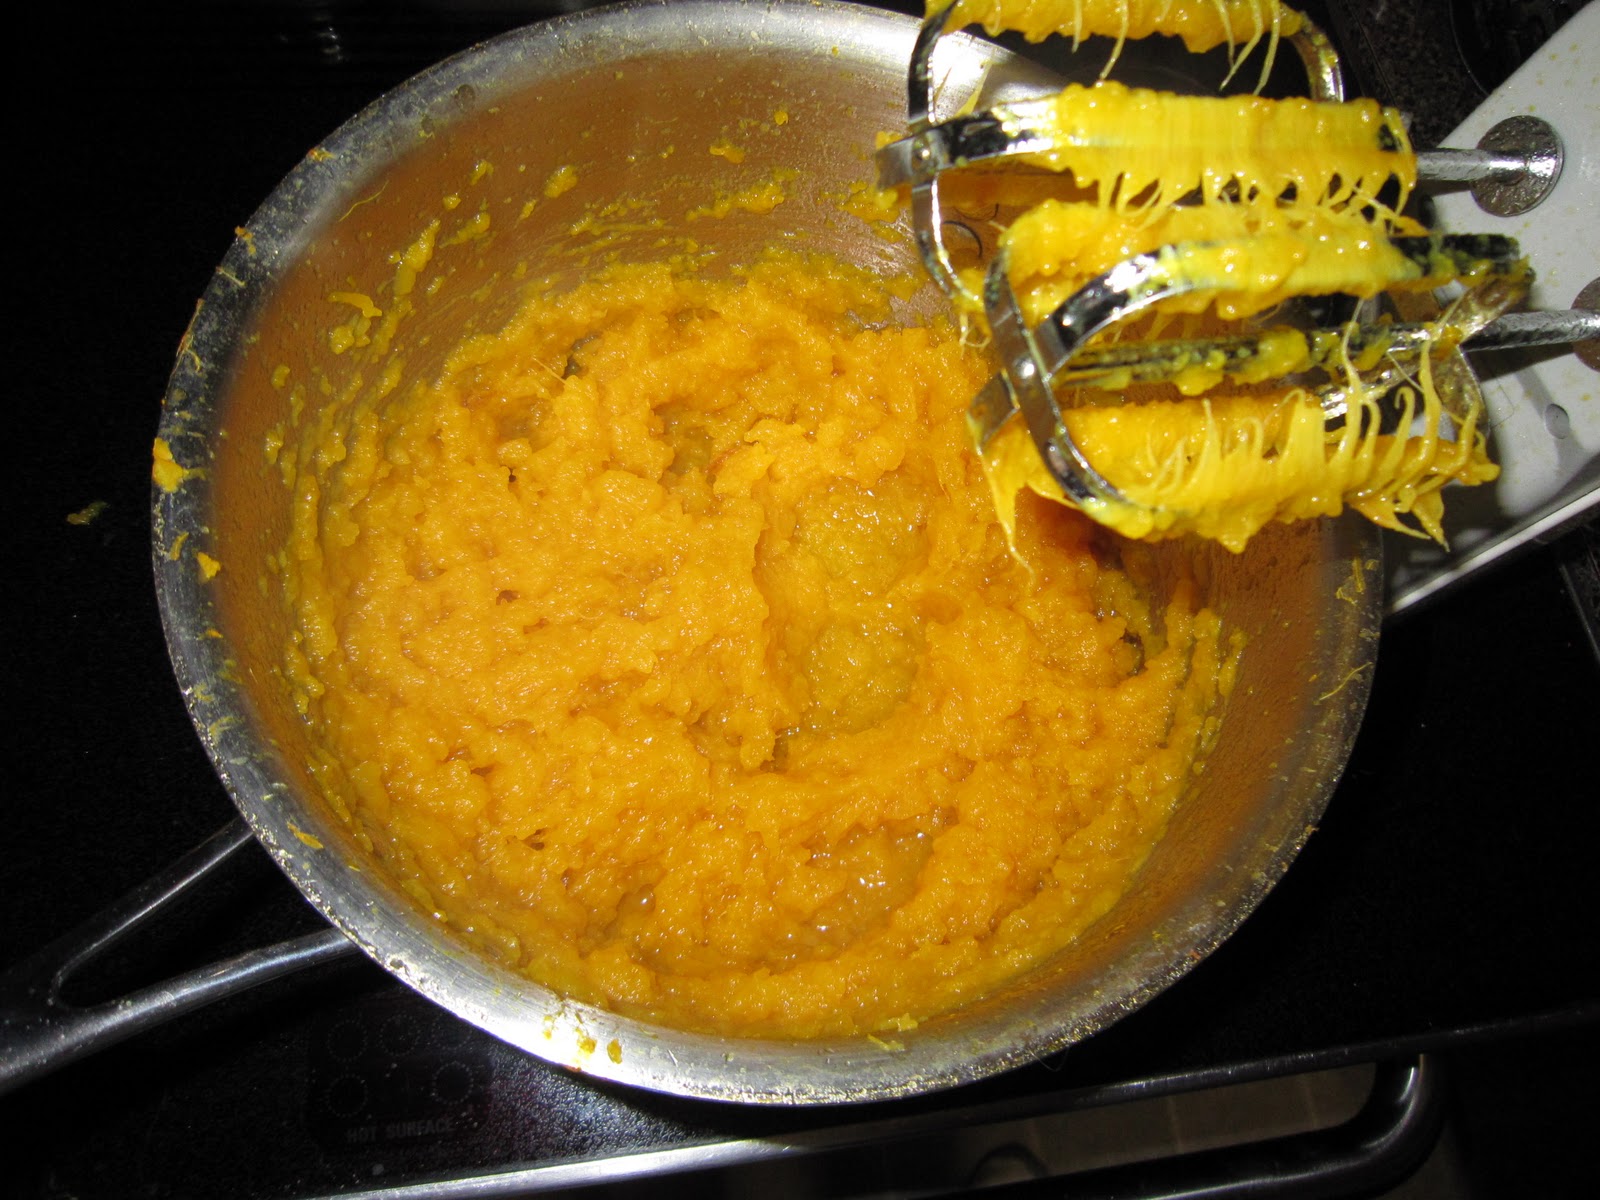
Drain the excess water and use a potato masher or electric beater to smooth out the cooked pumpkin. You can continue to cook it and beat it to make it smoother, but I normally just beat it once and it works fine for me.


And there you have it! Go ahead and use for your favorite recipes and freeze what's left. If your recipe calls for 1 can of pumpkin, use 2 cups of this fresh, cooked pumpkin.

To drain excess liquid from the pumpkin, line a large strainer with cheesecloth (double thickness), coffee filters or a clean dishtowel (that may turn orange). Place the strainer into a bowl, then pour your pumpkin into it. Place it into the refrigerator overnight, and the liquid should drain out into your bowl.