It's Halloween, and pumpkins are everywhere. After Halloween, don't just toss your pumpkin into the compost heap - cook it and use it in recipes for a delicious, healthy and inexpensive treat. Once you taste your recipes with fresh pumpkin, you'll never use canned pumpkin again.
I like to cook 7 - 8 pumpkins each Fall, and what isn't used immediately gets frozen in plastic freezer bags. I have used it up to a year later without any freezer burn. This cooked pumpkin can be substituted for any recipe that calls for pumpkin - canned pumpkin or pumpkin puree. I have used this to make pumpkin for everything from pumpkin cheesecake, muffins, bread, to soups, and everyone always loves it! If you use this cooked pumpkin for a pie, you'll want to drain the liquid from it prior to using (see note at the bottom of this post).
Many people also think that you have to use a "pie pumpkin" to cook fresh pumpkin. This isn't true! I always cook our large and small pumpkins this way, and they always turn out great. Don't waste those big pumpkins - cook them!
First, thoroughly wash the exterior of your pumpkin. Cut it open and remove the seeds and pulp that are inside. If you're interested in roasting the seeds to eat (they're yummy!), separate those from the pulp as much as possible when you're emptying out the pumpkin.
Once you have cleaned out the pumpkin, cut it into smaller pieces (no larger than 3 - 4") and place them in a single layer in a microwave-safe dish. It's best to put the exterior side up.
Put 1/2" - 3/4" of water into the dish, and microwave for 10 minutes. Check the pumpkin by poking the flesh with a fork to see if it's soft. Be sure to test pieces in difference sides of the dish to make sure they are all done. If not yet soft, continue to microwave at 3 minute intervals until all pieces are soft. Be sure to add more water if needed - you don't want to let the dish dry out.
Once the pumpkin pieces are soft, set the dish out and let the pieces cool. You can speed this up by draining out the water, and even placing the dish in the fridge if you want. The pieces don't have to be completely cooled, but you will want them to be cooler for the next step since you'll be handling the pieces.
When they're cool enough to handle, scoop out the cooked pumpkin flesh with a spoon and discard the rind.
Place the cooked pumpkin into a pot. If you want, you can continue to cook the pumpkin by adding about 1" of water into the pot and cooking, covered, on medium heat. The pumpkin will continue to get darker and less pulpy as you cook it longer.
Honestly, though, I normally don't cook it much past this point...I just go to the next step.
Drain the excess water and use a potato masher or electric beater to smooth out the cooked pumpkin. You can continue to cook it and beat it to make it smoother, but I normally just beat it once and it works fine for me.
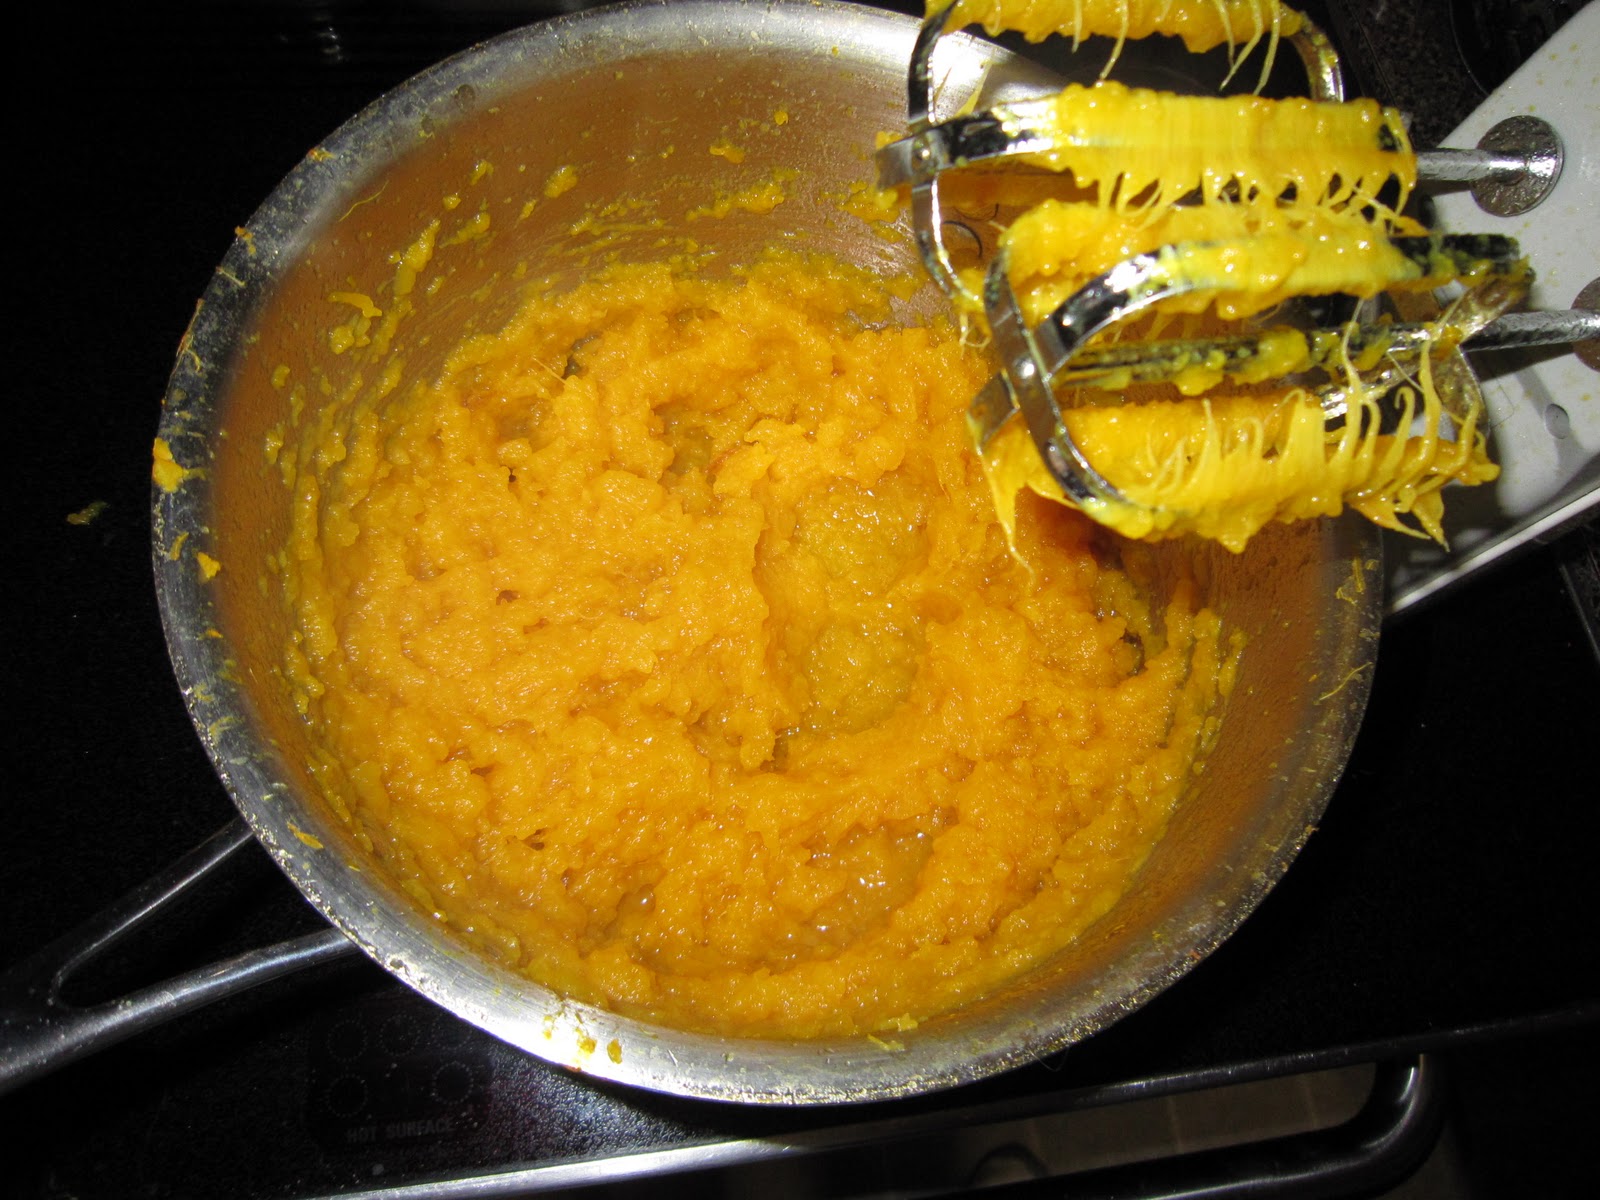
And there you have it! Go ahead and use for your favorite recipes and freeze what's left. If your recipe calls for 1 can of pumpkin, use 2 cups of this fresh, cooked pumpkin.
To drain excess liquid from the pumpkin, line a large strainer with cheesecloth (double thickness), coffee filters or a clean dishtowel (that may turn orange). Place the strainer into a bowl, then pour your pumpkin into it. Place it into the refrigerator overnight, and the liquid should drain out into your bowl.
There's nothing you can't do.
Wednesday, October 26, 2011
Tuesday, October 11, 2011
Make a Neck Warmer for a Little Girl
Now that the weather is getting chillier, my 4-year-old daughter asked for a tube scarf of her own. I have a pretty decent stash of felted wool sweaters, so I let her pick out the colors she wanted and got to work.
Here is the finished product, modeled by the cutest cowl scarf-wearing girl this side of the Mississippi:
To make the felted wool, pick up a pretty 100% wool sweater at a thrift store or yard sale, then wash it, with regular detergent, in your washing machine using hot water. Dry it in the dryer until it's dry. It should shrink considerably, and that shrinkage will felt the wool and give you a nice, tight weave that won't fray. It's important that the sweater is 100% wool, and that it's washed in hot water, not warm. If the sweater isn't 100% wool, you won't get as much shrinkage and it won't felt properly.
I started with a purple sweater, and since this tube scarf is for a little girl, I simple cut one of the sleeves straight up from the armpit, then made another parallel cut a few inches below that.
Hang on to the lower sleeve, you'll need it later. At this point, I made my daughter try on the upper sleeve piece, just to make sure it would fit comfortably over her head.
For the lining, I picked out an old beige long-sleeved t-shirt that once belonged to my husband. The knit was nice and soft. I used the sweater scarf piece to cut a similarly-sized piece from the upper sleeve of the t-shirt.
Now, place the two pieces right sides together, matching up the seams.
Sew them together at the top using a mid-length straight stitch. Stretch the fabric as you sew to ensure the scarf will have enough stretch to fit over the wearer's head without breaking the thread.
Once that stitch is done, flip the scarf so that the wrong sides are together.
Now stitch together the bottom, using a zigzag stitch along the edge while stretching the fabric to create a lettuce/ruffle edge.
This is the finished plain tube scarf:
My daughter wanted something a bit snazzier, though, so we decided to add a ruffle flower to the front.
Using the lower sleeve, cut three circles - one large, one medium-sized, and one small.
Here is the finished product, modeled by the cutest cowl scarf-wearing girl this side of the Mississippi:
To make the felted wool, pick up a pretty 100% wool sweater at a thrift store or yard sale, then wash it, with regular detergent, in your washing machine using hot water. Dry it in the dryer until it's dry. It should shrink considerably, and that shrinkage will felt the wool and give you a nice, tight weave that won't fray. It's important that the sweater is 100% wool, and that it's washed in hot water, not warm. If the sweater isn't 100% wool, you won't get as much shrinkage and it won't felt properly.
I started with a purple sweater, and since this tube scarf is for a little girl, I simple cut one of the sleeves straight up from the armpit, then made another parallel cut a few inches below that.
Hang on to the lower sleeve, you'll need it later. At this point, I made my daughter try on the upper sleeve piece, just to make sure it would fit comfortably over her head.
For the lining, I picked out an old beige long-sleeved t-shirt that once belonged to my husband. The knit was nice and soft. I used the sweater scarf piece to cut a similarly-sized piece from the upper sleeve of the t-shirt.
Now, place the two pieces right sides together, matching up the seams.
Sew them together at the top using a mid-length straight stitch. Stretch the fabric as you sew to ensure the scarf will have enough stretch to fit over the wearer's head without breaking the thread.
Once that stitch is done, flip the scarf so that the wrong sides are together.
Now stitch together the bottom, using a zigzag stitch along the edge while stretching the fabric to create a lettuce/ruffle edge.
This is the finished plain tube scarf:
My daughter wanted something a bit snazzier, though, so we decided to add a ruffle flower to the front.
Using the lower sleeve, cut three circles - one large, one medium-sized, and one small.
Using the same stretch/zigzag edge stitch, sew the edge of each circle so that it has a ruffle. Stack the three with the large circle on the bottom and the small on top.
I then hand-stitched the three onto the front of the scarf, with a small button in the middle and top.
And there you have it! It was quick to make and should be snuggly and warm for my daughter this winter!
If you wanted to make a larger one, you would use the same techniques, just make a larger tube out of the main sweater (and a t-shirt) rather than using the sleeves.
The great thing about these tube scarves is that you can pull them up over your face when it's extremely cold, or use them as a large headband/ear cover. They're very versatile, and so easy to make!
You'll want to hang on to the rest of the sweater, too. It's big enough to make a felted wool purse, a hat, or several other projects that you might see here soon!
Thursday, September 29, 2011
How to Jazz Up a Plain T-shirt
It's really easy to turn a plain t-shirt into something special. I love orange, and an over-sized orange T-shirt recently caught my eye in the Men's section of a local thrift shop. I picked it up for $1.99 and brought it home. It was bulky and had gray layered trim:
The trim was first to go. I cut the edges above the seams, leaving them raw with no more gray. I was interested in a more fitted and contoured look, so I turned the shirt inside out and used pins to fit the shirt to my hips, waist, and underarms. I removed the shirt and sewed new seams up each side, where I'd pinned. I tried on the shirt to make sure the fit was right, then trimmed the seams (down to 1/4" to 1/2" - to remove the bulk). If you don't want to try pinning the shirt while you're wearing it, use a T-shirt that you already have that fits well and has the same silhouette you're after - just turn your new shirt inside out, lay your existing shirt on top, and pin your new shirt to follow the seams of your old shirt.
I didn't want to leave the edges raw, but I also didn't want to go to the trouble of hemming all the edges. So, I decided to do a lettuce edge using a zigzag stitch along the edges. The trick is to set your machine to the widest zigzag, a short stitch, and then stretch the fabric as you sew. Sew this zigzag right on the edge. The more you stretch the fabric, the more ruffle you get along the edge. I personally like a contrasting thread for the lettuce edge, so I just used an off-white thread for my orange shirt.
Finally, I wanted something to do something to make the T-shirt prettier. I had some beautiful fabric that matched the orange shirt and also added a splash of vibrant colors. I sewed a few pieces together, forming a narrow tube scarf. You could also use an existing scarf, a ribbon, or any piece of narrow fabric. I started in the middle back of the shirt and cut two holes in the shirt, roughly an inch or so apart from each other, and a couple of inches down from the edge. I then cut pairs of similar holes every few inches, going around the neckline, each pair a couple of inches down from the edge. My motto is that I avoid measuring whenever possible, and most of the time it works out fine. I like to just use my fingers to do a rough measure to try to evenly space, but if you're more of a perfectionist, you could measure the neckline to ensure your cuts are evenly spaced.
Once I had my pairs of holes cut, I wove the scarf through the holes and gathered it gently to pull in the neckline. Since I'd cut the neckline away, this pulled it back up to avoid the Flashdance off-the-shoulder look (fine for many, just not for me). The T-shirt material shouldn't unravel or tear where it's cut, but if you have a particularly fragile piece of fabric and are worried about fraying, you could finish the cuts with Fray Check prior to adding the scarf.
The scarf can be tied in a knot, bow, or just left hanging, to change up the look a little. If your scarf is washable, it can be left as is for laundry. If not, just remove it prior to washing.
I really like the end result. Here are the pictures!
The trim was first to go. I cut the edges above the seams, leaving them raw with no more gray. I was interested in a more fitted and contoured look, so I turned the shirt inside out and used pins to fit the shirt to my hips, waist, and underarms. I removed the shirt and sewed new seams up each side, where I'd pinned. I tried on the shirt to make sure the fit was right, then trimmed the seams (down to 1/4" to 1/2" - to remove the bulk). If you don't want to try pinning the shirt while you're wearing it, use a T-shirt that you already have that fits well and has the same silhouette you're after - just turn your new shirt inside out, lay your existing shirt on top, and pin your new shirt to follow the seams of your old shirt.
I didn't want to leave the edges raw, but I also didn't want to go to the trouble of hemming all the edges. So, I decided to do a lettuce edge using a zigzag stitch along the edges. The trick is to set your machine to the widest zigzag, a short stitch, and then stretch the fabric as you sew. Sew this zigzag right on the edge. The more you stretch the fabric, the more ruffle you get along the edge. I personally like a contrasting thread for the lettuce edge, so I just used an off-white thread for my orange shirt.
Finally, I wanted something to do something to make the T-shirt prettier. I had some beautiful fabric that matched the orange shirt and also added a splash of vibrant colors. I sewed a few pieces together, forming a narrow tube scarf. You could also use an existing scarf, a ribbon, or any piece of narrow fabric. I started in the middle back of the shirt and cut two holes in the shirt, roughly an inch or so apart from each other, and a couple of inches down from the edge. I then cut pairs of similar holes every few inches, going around the neckline, each pair a couple of inches down from the edge. My motto is that I avoid measuring whenever possible, and most of the time it works out fine. I like to just use my fingers to do a rough measure to try to evenly space, but if you're more of a perfectionist, you could measure the neckline to ensure your cuts are evenly spaced.
Once I had my pairs of holes cut, I wove the scarf through the holes and gathered it gently to pull in the neckline. Since I'd cut the neckline away, this pulled it back up to avoid the Flashdance off-the-shoulder look (fine for many, just not for me). The T-shirt material shouldn't unravel or tear where it's cut, but if you have a particularly fragile piece of fabric and are worried about fraying, you could finish the cuts with Fray Check prior to adding the scarf.
The scarf can be tied in a knot, bow, or just left hanging, to change up the look a little. If your scarf is washable, it can be left as is for laundry. If not, just remove it prior to washing.
I really like the end result. Here are the pictures!
Sunday, August 21, 2011
Fix Your Jeep Wrangler Soft Top with Fishing Line
We have a Jeep Wrangler. It's great, but it has a little age on it. It has a soft top, and the back window zipper broke. The weather was warm at the time, so my husband just drove it without a back window. That was fine, except when it rained. The air conditioner wasn't very effective on really hot days, either.
A new top for the Jeep would be really pricey, and my husband didn't have a need to remove the window regularly. So, I picked up some fishing line and used it, along with an embroidery needle, to sew the window onto the Jeep top.
I started in the lower right and worked my way around, just looping the line/thread around the zipper to hold it.
The velcro is officially "new sew," meaning it is self-adhesive. I'm pretty sure it wouldn't stick very long on the back of a Jeep, out in the weather, though. So, I used the fishing line to sew the velcro pieces down the left edges.
Again, it isn't the prettiest job around, and it doesn't really have to be: it gets the job done. The flaps cover the velcro and stitches nicely, and so far it's working great!
A new top for the Jeep would be really pricey, and my husband didn't have a need to remove the window regularly. So, I picked up some fishing line and used it, along with an embroidery needle, to sew the window onto the Jeep top.
I started in the lower right and worked my way around, just looping the line/thread around the zipper to hold it.
It doesn't look great, but the outer flap covers it nicely, so it really doesn't matter:
However, we did want the ability to open and close the left side so we could add and remove larger things from the back of the Jeep. So, I stopped sewing in the upper left corner, and picked up some black velcro.
The velcro is officially "new sew," meaning it is self-adhesive. I'm pretty sure it wouldn't stick very long on the back of a Jeep, out in the weather, though. So, I used the fishing line to sew the velcro pieces down the left edges.
Again, it isn't the prettiest job around, and it doesn't really have to be: it gets the job done. The flaps cover the velcro and stitches nicely, and so far it's working great!
Wednesday, July 20, 2011
Dry Hair Haiku
Hair, dry and brittle
Don't fear ethnic hair care aisle
Hair is smooth once more
My skin is just about as pale as a human's can get, but these really have been the greatest products for my dry, frizzy blond(ish) hair. We have well water, and the extra minerals dry out my hair even more. I don't know why the company that makes these products doesn't market them more broadly - I mean, dry hair is dry hair, regardless of your race, right?
Anyway, you can check them out here.
Tuesday, July 19, 2011
Print Your Own Board Book or Photo Book - At Home!
Are you looking for a unique gift idea that you can make yourself? My 4-year-old daughter went through a phase a couple of years ago in which she constantly replied, "I can't" to most any request. It frustrated me to no end, so I wrote her a little book about how nothing good ever happens when you think you can't.
I wrote the words and drew some fairly crude, but colorful, pictures using her colored pencils. I cut out the pictures and used my scanner to place them on the pages and save them as a JPG file. Given my target audience, though, I think it turned out nice. It was a big hit with her!
I have since printed more of these books to give as gifts to her friends. It makes a nice, personalized gift that will be appreciated for years. You can use these steps to make a book for anyone of any age. If you've ever wanted to give a parent or grandparent a personalized photo book, you can use this technique to print your own photos and put them together into a book!
What You'll Need:
1. Create your book and save the pages as JPG files. You can do this through a variety of methods:
I'm sure there are other methods that I have missed, but the important thing is to create your content so you can print your pages. Don't worry if the book you create has more pages than your board book. Also, don't forget to create a front and back cover with your book's title and any other information about you and your book!
2. Print your pages using whatever method you normally use to print photos. First, print one test page on regular paper to make sure the dimensions are correct for your board book. Adjust as needed, then reprint on regular paper until it's just right. That way, you won't need to worry about wasting the Invent It Project Paper.
3. Once the dimensions fit your pages, put the Invent It Project Paper in your printer and print out your pages. Let the ink dry completely on your pages before handling them. Trim any excess from your pages (but keep what you trim), peel backing from the Project Paper, and place the adhesive printed page to your board book.
The only tricky parts are making sure each page is centered and making sure there aren't any air bubbles. I like to start in one corner and then gently press it down as I go across.
4. If your board book has too many pages, use your scissors to cut out the extra pages by using your scissors to cut the paper on the inside of the book's spine.
Then you can use the extra strips of paper to cover the exposed inner-spine to strengthen the smaller book. Be sure to press the paper down into the crevices.
5. Now you can attach your remaining pages to finish your book.
There you have it! You no longer need to pay to have your photo books printed for Grandparent gifts, Christmas, Mother's Day, Father's Day, or birthdays. You can just create and print your own. Plus, gifts are always extra special when you make them yourself.
If you're giving the book as a gift from your child, you can even leave a couple of extra pages in the middle or at the end, then let your child hand write his or her message using markers, and add his or her own drawings!
I wrote the words and drew some fairly crude, but colorful, pictures using her colored pencils. I cut out the pictures and used my scanner to place them on the pages and save them as a JPG file. Given my target audience, though, I think it turned out nice. It was a big hit with her!
I have since printed more of these books to give as gifts to her friends. It makes a nice, personalized gift that will be appreciated for years. You can use these steps to make a book for anyone of any age. If you've ever wanted to give a parent or grandparent a personalized photo book, you can use this technique to print your own photos and put them together into a book!
What You'll Need:
- Your book's content in JPG format
- Self-adhesive, glossy photo quality paper such as Invent It! Project Paper or LD Glossy Inkjet Photo Sticker Paper
- Ink-jet printer
- A child's board book that you no longer need (If you don't have one, they can be picked up inexpensively at thrift stores and yard sales)
- Scissors
1. Create your book and save the pages as JPG files. You can do this through a variety of methods:
- Write your words and pictures by hand and scan the pages using a scanner
- Use software such as Powerpoint to create pages with words and your photos by saving the slides in JPG format
- Use software such as Microsoft Paint to create pages with words and pictures
- Use existing digital photos that are already in JPG format, then print any words separately in a word processing program (like Microsoft Word). You can then trim them and attach them separately to your pages.
I'm sure there are other methods that I have missed, but the important thing is to create your content so you can print your pages. Don't worry if the book you create has more pages than your board book. Also, don't forget to create a front and back cover with your book's title and any other information about you and your book!
2. Print your pages using whatever method you normally use to print photos. First, print one test page on regular paper to make sure the dimensions are correct for your board book. Adjust as needed, then reprint on regular paper until it's just right. That way, you won't need to worry about wasting the Invent It Project Paper.
3. Once the dimensions fit your pages, put the Invent It Project Paper in your printer and print out your pages. Let the ink dry completely on your pages before handling them. Trim any excess from your pages (but keep what you trim), peel backing from the Project Paper, and place the adhesive printed page to your board book.
The only tricky parts are making sure each page is centered and making sure there aren't any air bubbles. I like to start in one corner and then gently press it down as I go across.
4. If your board book has too many pages, use your scissors to cut out the extra pages by using your scissors to cut the paper on the inside of the book's spine.
5. Now you can attach your remaining pages to finish your book.
There you have it! You no longer need to pay to have your photo books printed for Grandparent gifts, Christmas, Mother's Day, Father's Day, or birthdays. You can just create and print your own. Plus, gifts are always extra special when you make them yourself.
If you're giving the book as a gift from your child, you can even leave a couple of extra pages in the middle or at the end, then let your child hand write his or her message using markers, and add his or her own drawings!
Thursday, July 14, 2011
Salvage That Cracked Blush, Part 2
In Part 1, I turned my crumbled blush into a cream. That works better if you travel or otherwise move your make-up around quite a bit. If you don't, though, and want a dry blush in its original container, try these steps!
What You'll Need:
Rubbing alcohol
Cracked blush
Old bowl
Spoon
Original blush container
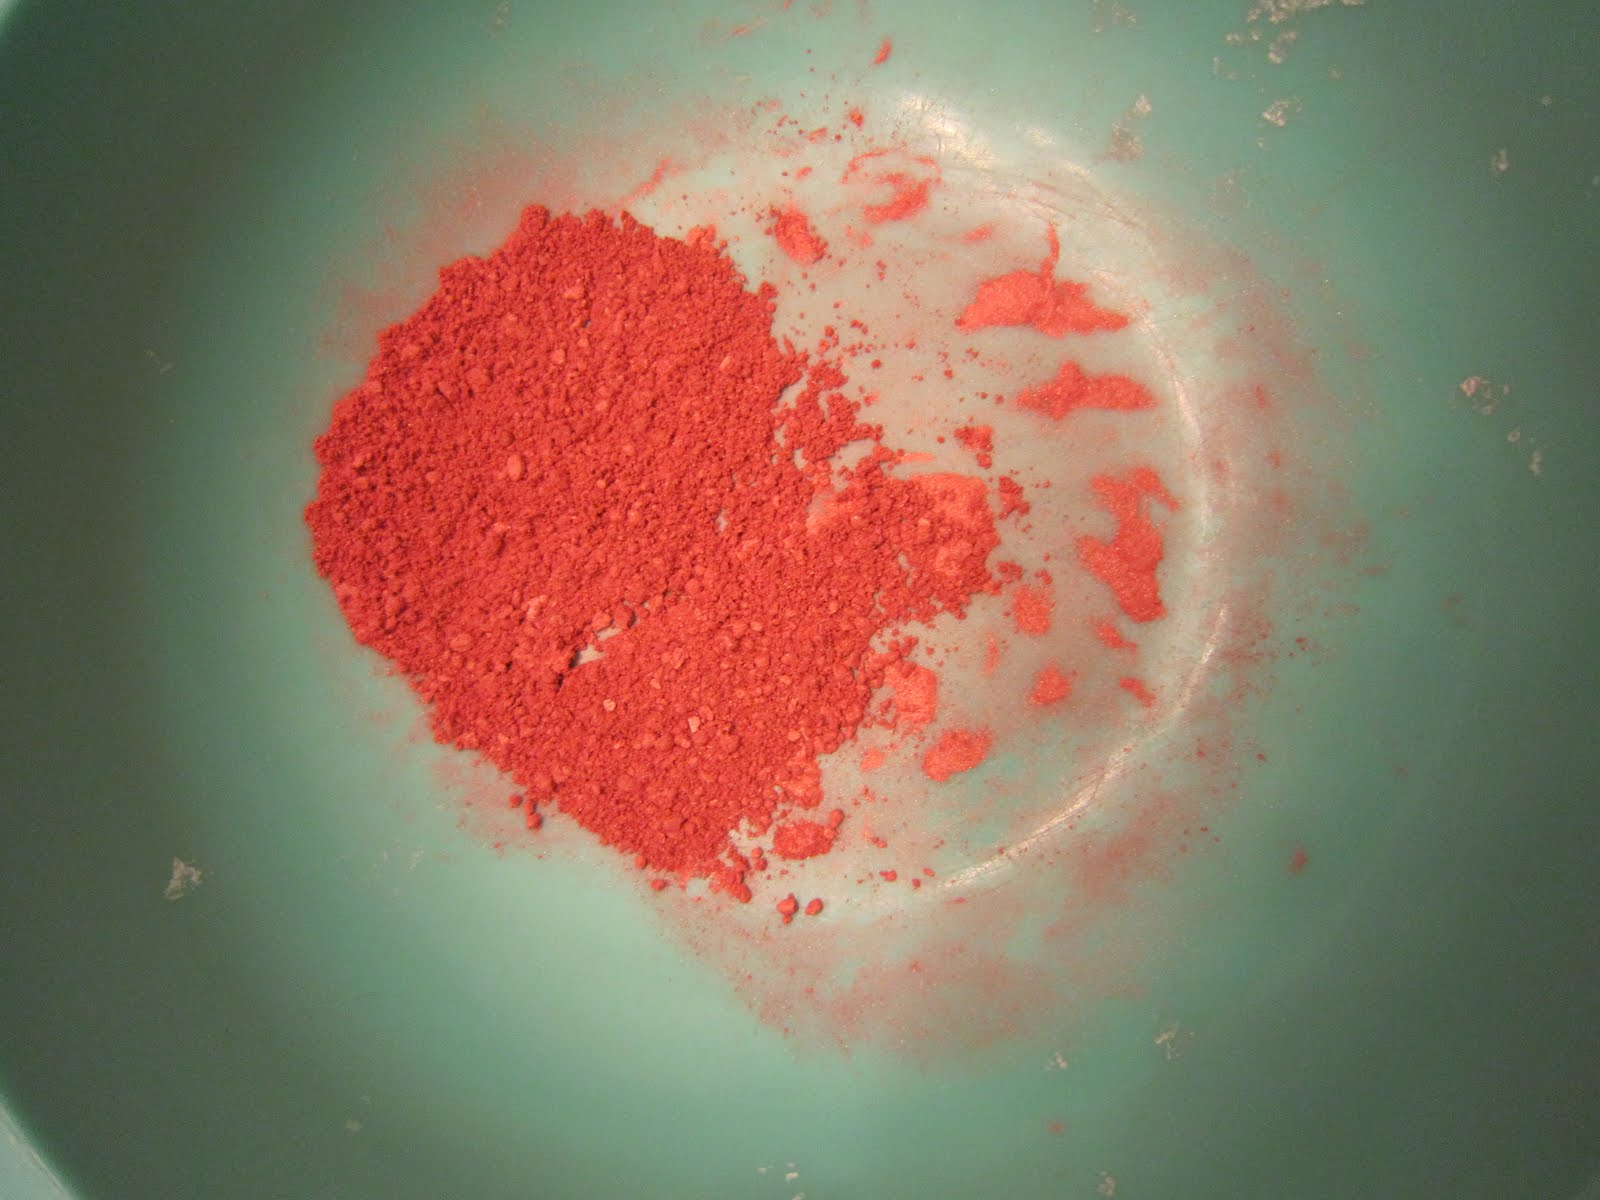
1. Pour your crumbled blush into the bowl, and crush the larger pieces with your spoon.
2. Make a paste by adding a small amount of rubbing alcohol. Don't worry about adding too much - it dries quickly.
3. Spoon the paste into the original blush container.
4. Spread it out by tamping the container a few times.
5. Place the container in a flat area where it won't be disturbed. The alcohol will dry, leaving you with smooth blush! Mine dried in less than a day, but drying times will vary based on humidity and temperature.
What You'll Need:
Rubbing alcohol
Cracked blush
Old bowl
Spoon
Original blush container
1. Pour your crumbled blush into the bowl, and crush the larger pieces with your spoon.
2. Make a paste by adding a small amount of rubbing alcohol. Don't worry about adding too much - it dries quickly.
3. Spoon the paste into the original blush container.
4. Spread it out by tamping the container a few times.
5. Place the container in a flat area where it won't be disturbed. The alcohol will dry, leaving you with smooth blush! Mine dried in less than a day, but drying times will vary based on humidity and temperature.
Wednesday, July 13, 2011
Salvage That Cracked Blush, Part 1
Do you ever find yourself trying to use blush that is cracked and loose? Mine fell off the bathroom counter and I have trying to use it up as is, but it's messy and difficult to handle and store. So, I tried out a couple of solutions that turned the pile of crumble into something more useful.
Both options were easy to do and worked well, so hopefully one will help you! This first option makes a blush that travels better, so if you travel a lot, or keep your make-up in a bag that gets moved around, you might want to try this option.
What You'll Need:
Cracked blush
White facial moisturizer
Spoon
Old Bowl
Small, airtight container
I have always preferred powder blush, but I really like how this cream looks and feels on my skin. A little bit goes a long way - it only takes a dab for great color!
I will post Part 2 soon, which will restore the crumbled blush back to a usable powder.
Both options were easy to do and worked well, so hopefully one will help you! This first option makes a blush that travels better, so if you travel a lot, or keep your make-up in a bag that gets moved around, you might want to try this option.
What You'll Need:
Cracked blush
White facial moisturizer
Spoon
Old Bowl
Small, airtight container
1. Put a small amount of cracked blush into the bowl. You might want to start with just a little bit until you're sure you like the results. Use your spoon to crush the larger pieces.
2. Add a little moisturizer, then mix into the powder.
3. Move the cream to your container, and that's it!
I have always preferred powder blush, but I really like how this cream looks and feels on my skin. A little bit goes a long way - it only takes a dab for great color!
I will post Part 2 soon, which will restore the crumbled blush back to a usable powder.
Thursday, July 7, 2011
Make Your Own No-Bake Cereal Bars
My daughter is 4, and she frequently likes to try new cereal. Unfortunately, she'll often like a new cereal for a few days, then she tires of it and it ends up going stale in our cabinet.
She does love cereal bars, though. So, I figured out a way to breathe new life into the leftover cereal. Plus, there is no better way to ensure that your cereal bar is healthy, fresh and delicious, than to make it yourself! She loves to eat these bars, and she also loves to help make them!
Total prep and cooking time: 10 minutes
Ingredients:
2 cups cereal (any kind of dry cereal works great!)
1/4 cup wheat germ, almond meal, or flax meal
1 1/4 cup rolled oats
1/4 teaspoon cinnamon
1/4 cup peanut butter or almond butter
2/3 cup brown sugar, lightly packed
2/3 cup milk
1 teaspoon vanilla
Directions:
Crush cereal with a glass or cup. It doesn't need to be crushed completely, it's okay if there are still some bigger pieces left.
Add the wheat germ (or almond meal/flax meal), rolled oats and cinnamon.
In a saucepan (or microwave oven), bring milk, brown sugar, and peanut butter to a boil.
Boil for 1 minute (stirring constantly) before removing from heat. Immediately add vanilla and cereal mix.
Mix well.
Pour onto cookie sheet lined with wax paper.
Cover with another piece of wax paper.
Flatten with a rolling pin, packing tightly.
Cool completely, then cut into 25 rectangles (or whatever size you prefer). I store these in an air-tight container in the fridge, but they could also be individually wrapped and frozen for longer life. You could also add raisins, nuts, chocolate chips for a little variety. Enjoy!
She does love cereal bars, though. So, I figured out a way to breathe new life into the leftover cereal. Plus, there is no better way to ensure that your cereal bar is healthy, fresh and delicious, than to make it yourself! She loves to eat these bars, and she also loves to help make them!
Total prep and cooking time: 10 minutes
Ingredients:
2 cups cereal (any kind of dry cereal works great!)
1/4 cup wheat germ, almond meal, or flax meal
1 1/4 cup rolled oats
1/4 teaspoon cinnamon
1/4 cup peanut butter or almond butter
2/3 cup brown sugar, lightly packed
2/3 cup milk
1 teaspoon vanilla
Directions:
Crush cereal with a glass or cup. It doesn't need to be crushed completely, it's okay if there are still some bigger pieces left.
Add the wheat germ (or almond meal/flax meal), rolled oats and cinnamon.
In a saucepan (or microwave oven), bring milk, brown sugar, and peanut butter to a boil.
Boil for 1 minute (stirring constantly) before removing from heat. Immediately add vanilla and cereal mix.
Mix well.
Pour onto cookie sheet lined with wax paper.
Cover with another piece of wax paper.
Flatten with a rolling pin, packing tightly.
Cool completely, then cut into 25 rectangles (or whatever size you prefer). I store these in an air-tight container in the fridge, but they could also be individually wrapped and frozen for longer life. You could also add raisins, nuts, chocolate chips for a little variety. Enjoy!
Tuesday, July 5, 2011
DIY Reusable Swiffer Cloths
We recently replaced the carpet in our den with laminate flooring. It looks great, but with 3 pets and a preschooler, I found myself in need of something to quickly and easily clean it every day or so. I picked up a Swiffer Sweeper and loved how easy it was to use (the preschooler loves to use it, too!).
It came with samples of both the dry and wet cloths. Between the vinyl flooring in our kitchen and the laminate in our den, we quickly used them all. I fell into the marketing trap and picked up a package of each the next time I went to the grocery store.
Once I got home and started using the packages (and, of course, tossing the used cloths into the trash), I realized that I could most likely find a reusable solution for the cloths. Thankfully it wasn't too hard!
I picked up a pack of utility dishcloths that are perfect! I was able to get this 9-pack for $3, and they should last a long, long time.
I can use them dry to pick up dust or pet hair, or I can lightly spray them with a vinegar/water mixture for light cleaning. When I'm finished, I just toss them into the wash and they're ready to use again.
For wet cloths, I put a few of them into the empty Swiffer Wet cloths container and added some of the vinegar/water solution. Whenever I want to mop the kitchen or bath, I just pull one out, wring out the extra water, and it works great.
I'm sometimes bothered by scented products, and I hadn't been able to find an unscented version of Swiffer's wet cloths. So this solution also solves that issue!
It came with samples of both the dry and wet cloths. Between the vinyl flooring in our kitchen and the laminate in our den, we quickly used them all. I fell into the marketing trap and picked up a package of each the next time I went to the grocery store.
Once I got home and started using the packages (and, of course, tossing the used cloths into the trash), I realized that I could most likely find a reusable solution for the cloths. Thankfully it wasn't too hard!
I picked up a pack of utility dishcloths that are perfect! I was able to get this 9-pack for $3, and they should last a long, long time.
I can use them dry to pick up dust or pet hair, or I can lightly spray them with a vinegar/water mixture for light cleaning. When I'm finished, I just toss them into the wash and they're ready to use again.
For wet cloths, I put a few of them into the empty Swiffer Wet cloths container and added some of the vinegar/water solution. Whenever I want to mop the kitchen or bath, I just pull one out, wring out the extra water, and it works great.
I'm sometimes bothered by scented products, and I hadn't been able to find an unscented version of Swiffer's wet cloths. So this solution also solves that issue!
Subscribe to:
Posts (Atom)